This is an old school LG G3 that was sent in completely dead. The screws on the back of the phone show significant rust indicating that it was dropped into water at some point. Definitely explains why it won’t turn on!
Phone disassembled.
I have gone ahead and removed the motherboard from the phone. I will be using the chip off method to access the data and recover the wallet.
The EMMC chip is surrounded by potting epoxy.
On the back of the motherboard is the EMMC chip where all the data is stored. It’s encased in a special black potting epoxy all around it to protect it. The epoxy has to be removed first before the chip can be desoldered from the motherboard, so here I have begun to scrape away at it from the sides.
Tools being used to remove the EMMC chip.
To remove the potting epoxy and desolder the EMMC chip so it can be read from I have a setup with a microscope, hot air soldering station, and other assorted soldering irons.
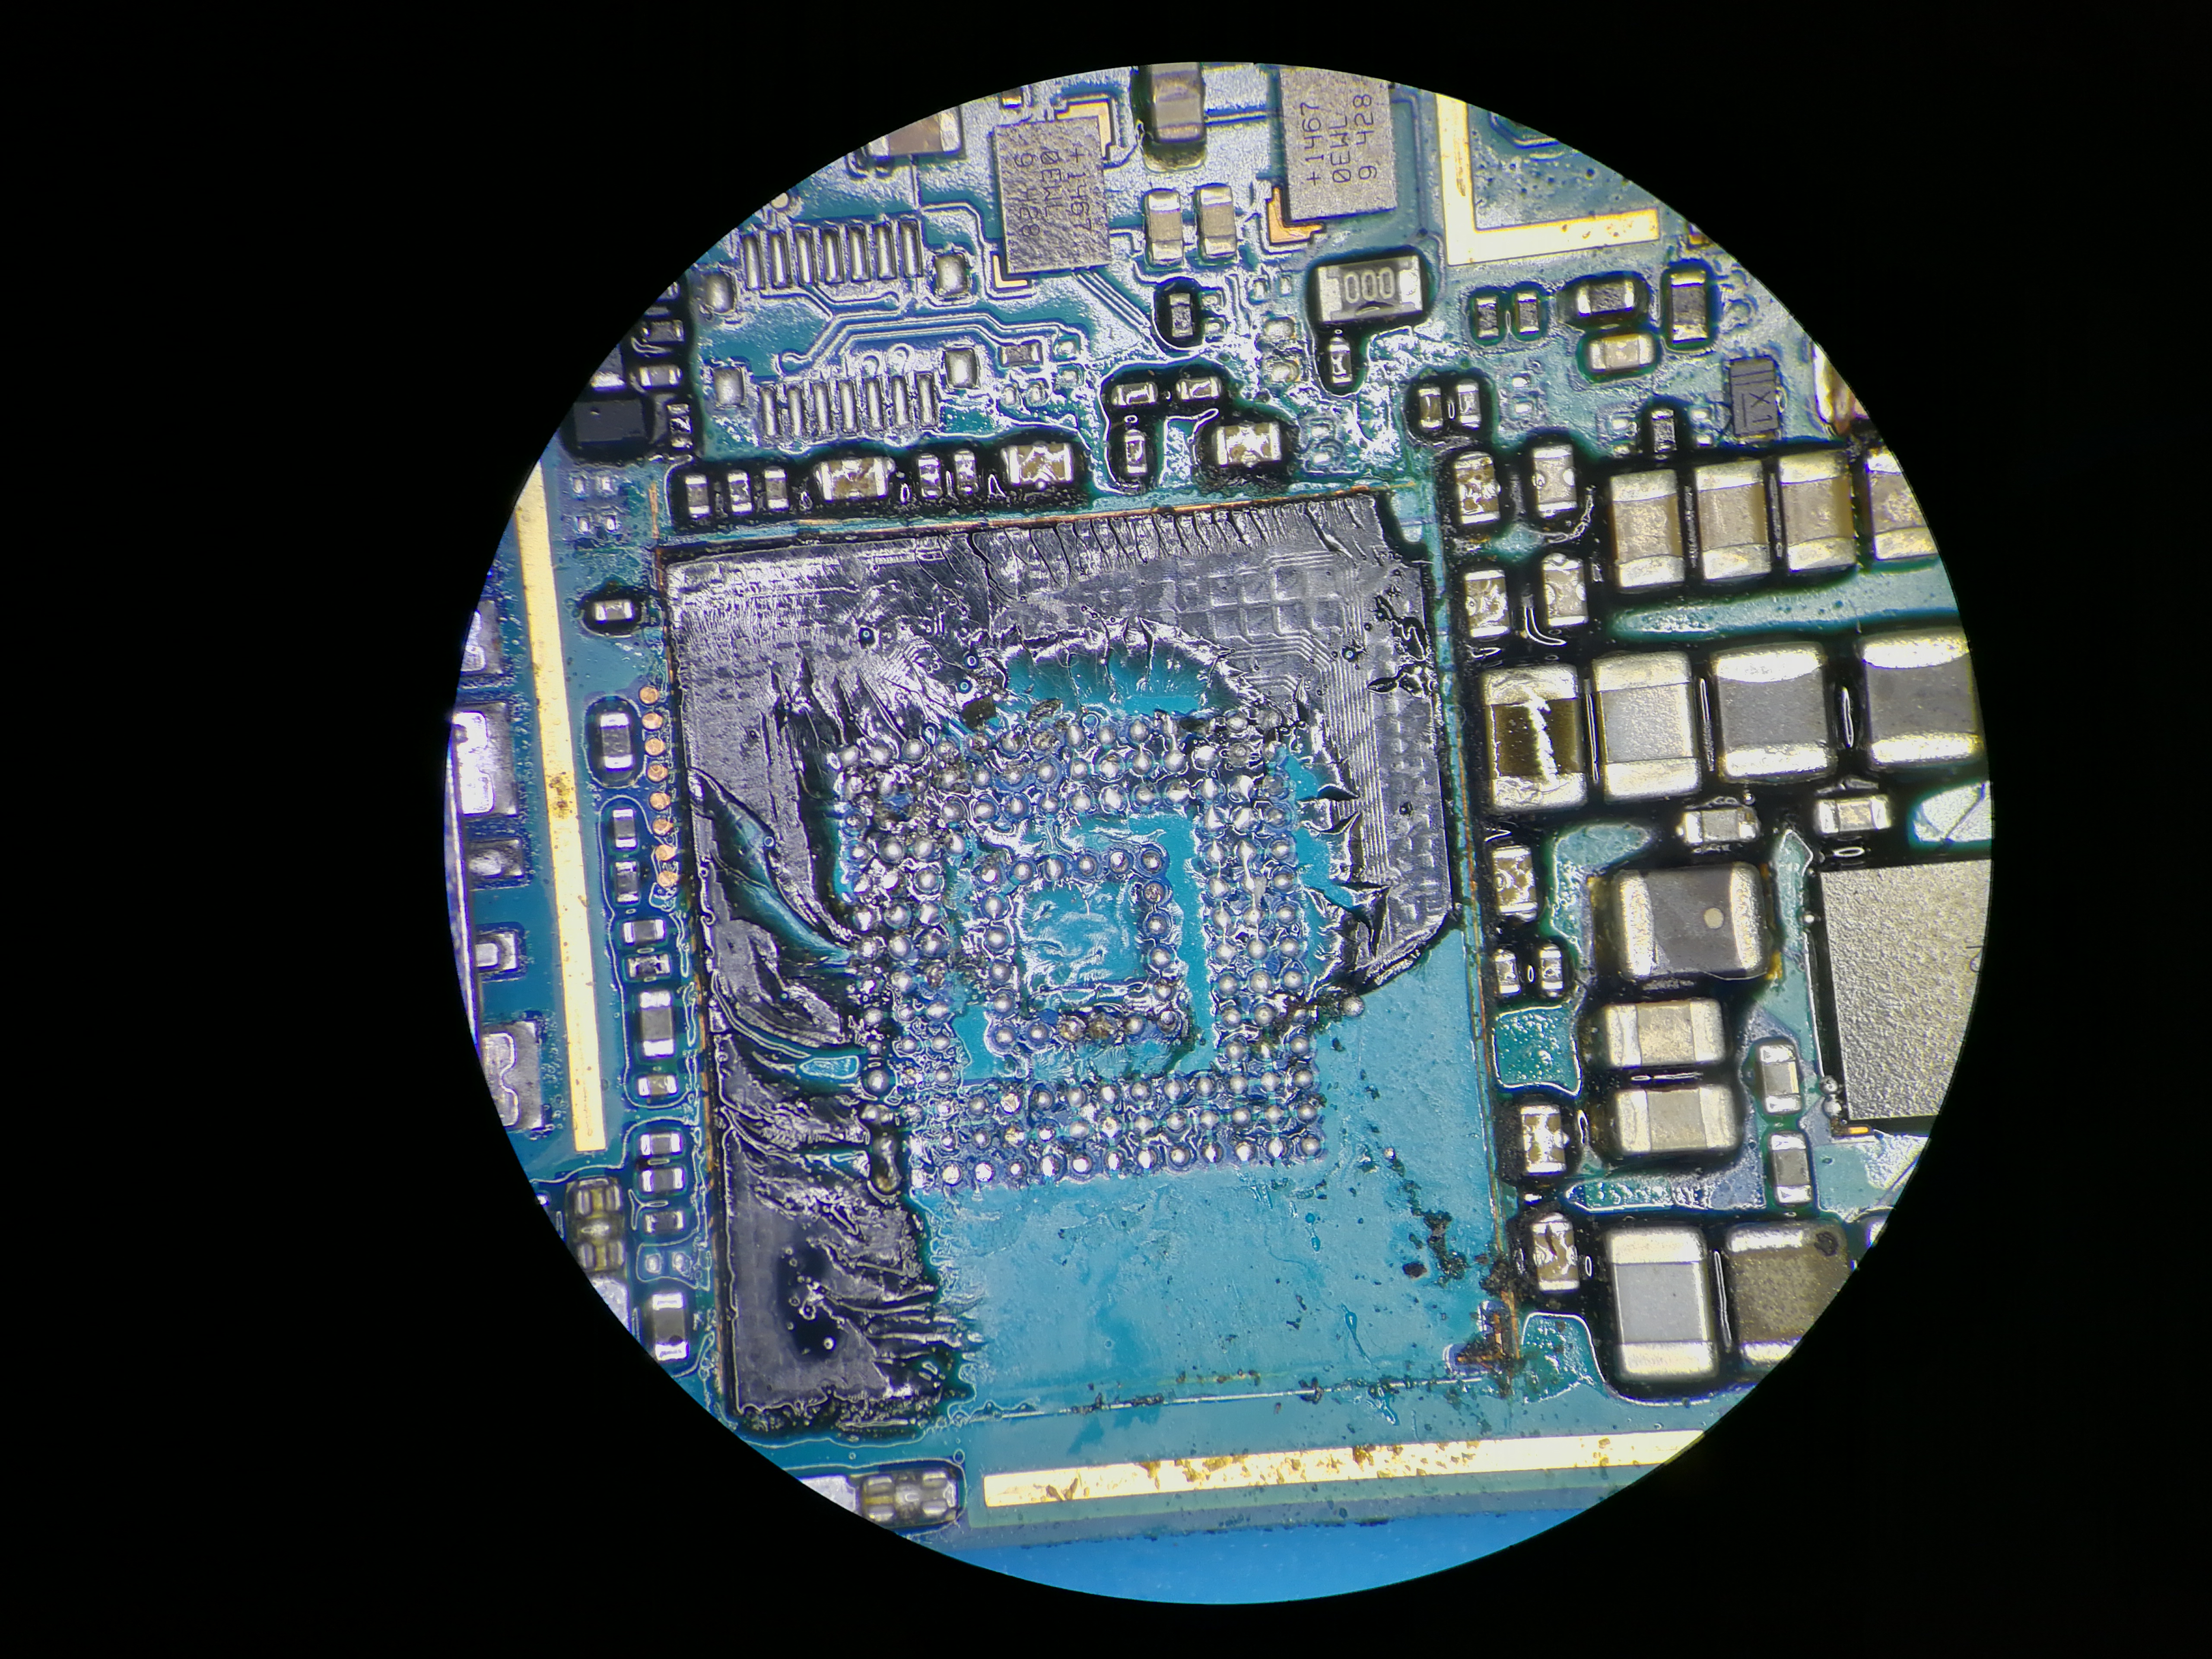
Desoldered the EMMC chip from the motherboard. Lots of potting epoxy underneath it.
The EMMC chip has been desoldered from the motherboard now. Here you can see a better view of the black potting epoxy that has been used to encase the chip. The silver pads beneath where the chip used to go are the pads on the motherboard that connect to the chip.
Cleaning up the EMMC chip for reading.
I put the chip into a vise so I can begin cleaning it up and removing any left over potting epoxy and solder. Unfortunately I didn’t get any photos of this stage but it was pretty messy anyways.
EMMC chip on top of a US dime.
Here it is all cleaned up and ready for reading. You can see it is barely the size of a dime!
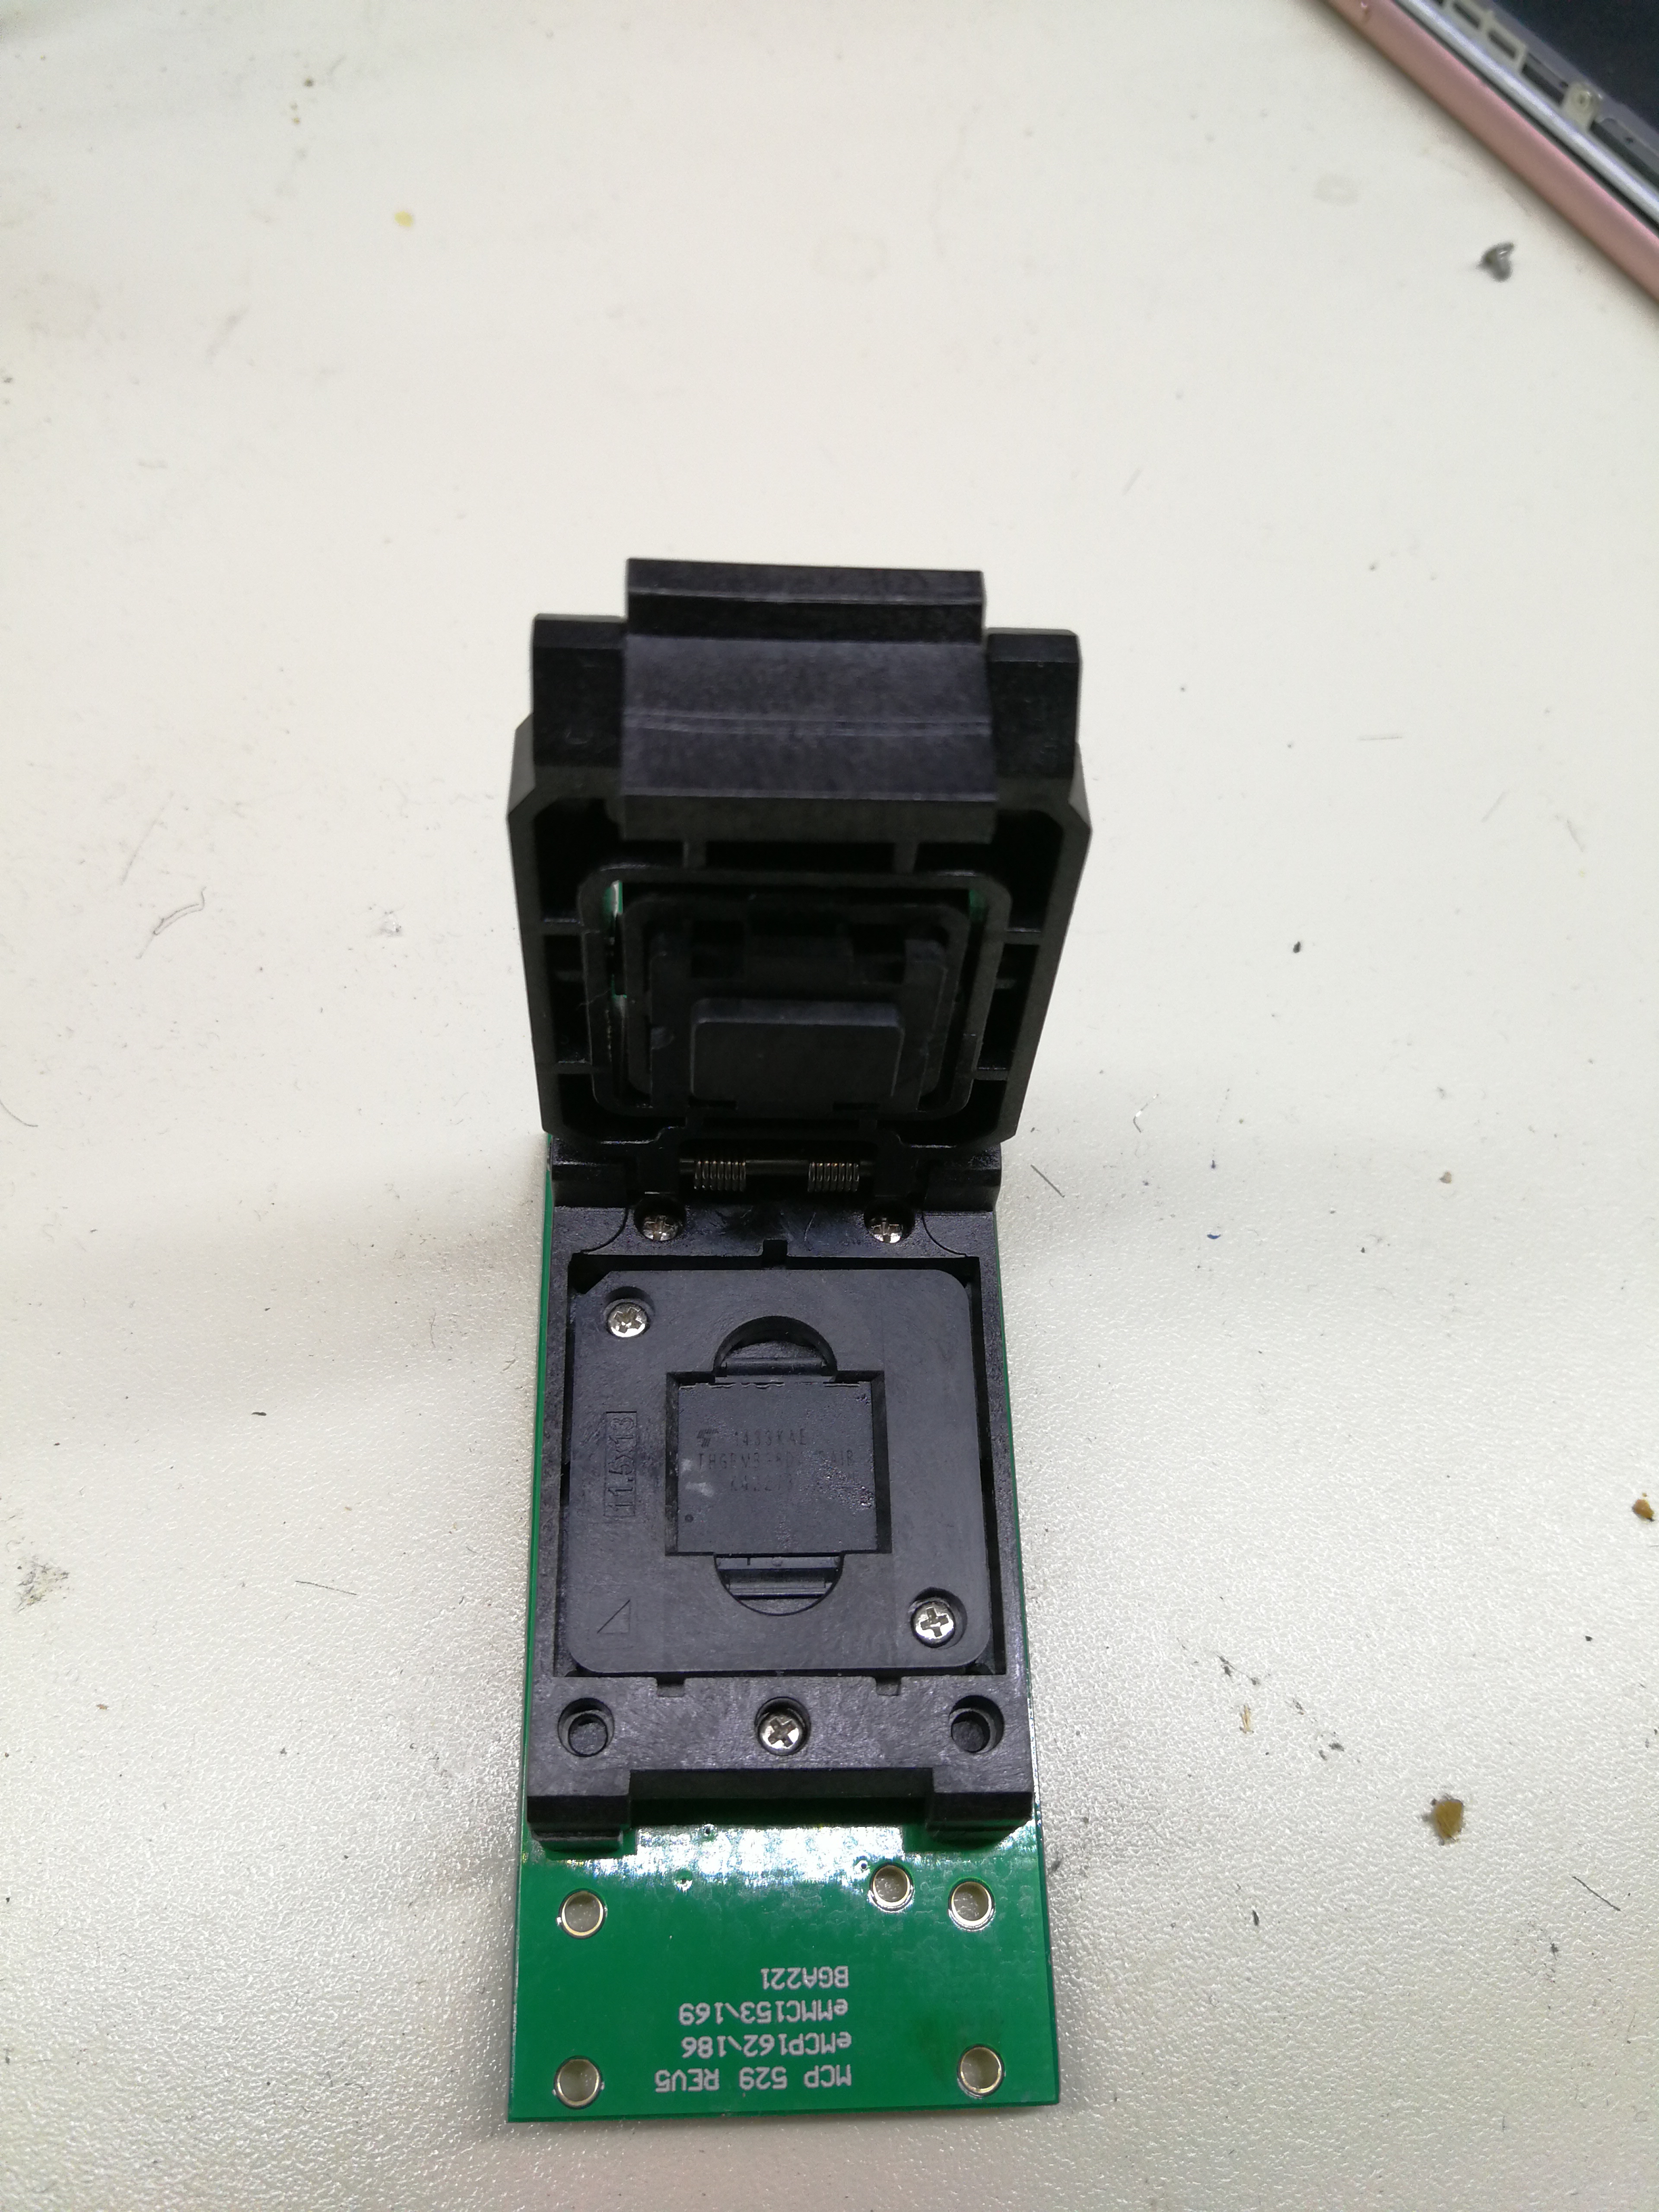
The EMMC reader.
The EMMC chip then goes into this EMMC reader to read the data directly from the EMMC chip.
Beginning the actual data recovery process.
Now we can plug the reader into the computer and begin exploring the filesystem.
Locating the Mycelium wallet in the filesystem.
Android apps typically store data in the /data/com.myApp location, not accessible to the user unless they have root access. Within the app’s storage there is a databases folder that contains some SQLite databases with the data the app stores. Here I have gotten access to the Android filesystem using UFS Explorer and located the com.Mycelium.wallet folder and the databases within it.
A Moto G4 that was lying around the shop. Perfect for my needs!
The tricky part will be getting the data from the app’s database into something I can use, like a private key. I quickly opened up the databases in an SQLite database GUI but did not find anything that immediately indicated a private key of sorts. However, I decided that in the unlikely chance that Mycelium does not encrypt the private keys (more on this later), I could simply copy the database onto a working device and see if Mycelium would open it for me instead of having to parse through the database and search for the private keys manually.
Unlocking the bootloader, made easy thanks to Motorola.
Since the app’s folder and databases are hidden from normal users in the Android filesystem, I would have to get root access in order to copy the recovered databases over to the working phone. Luckily though there was a Moto G4 running Marshmallow at the shop, so unlocking the bootloader and rooting the device was about as simple and straightforward as it could get.
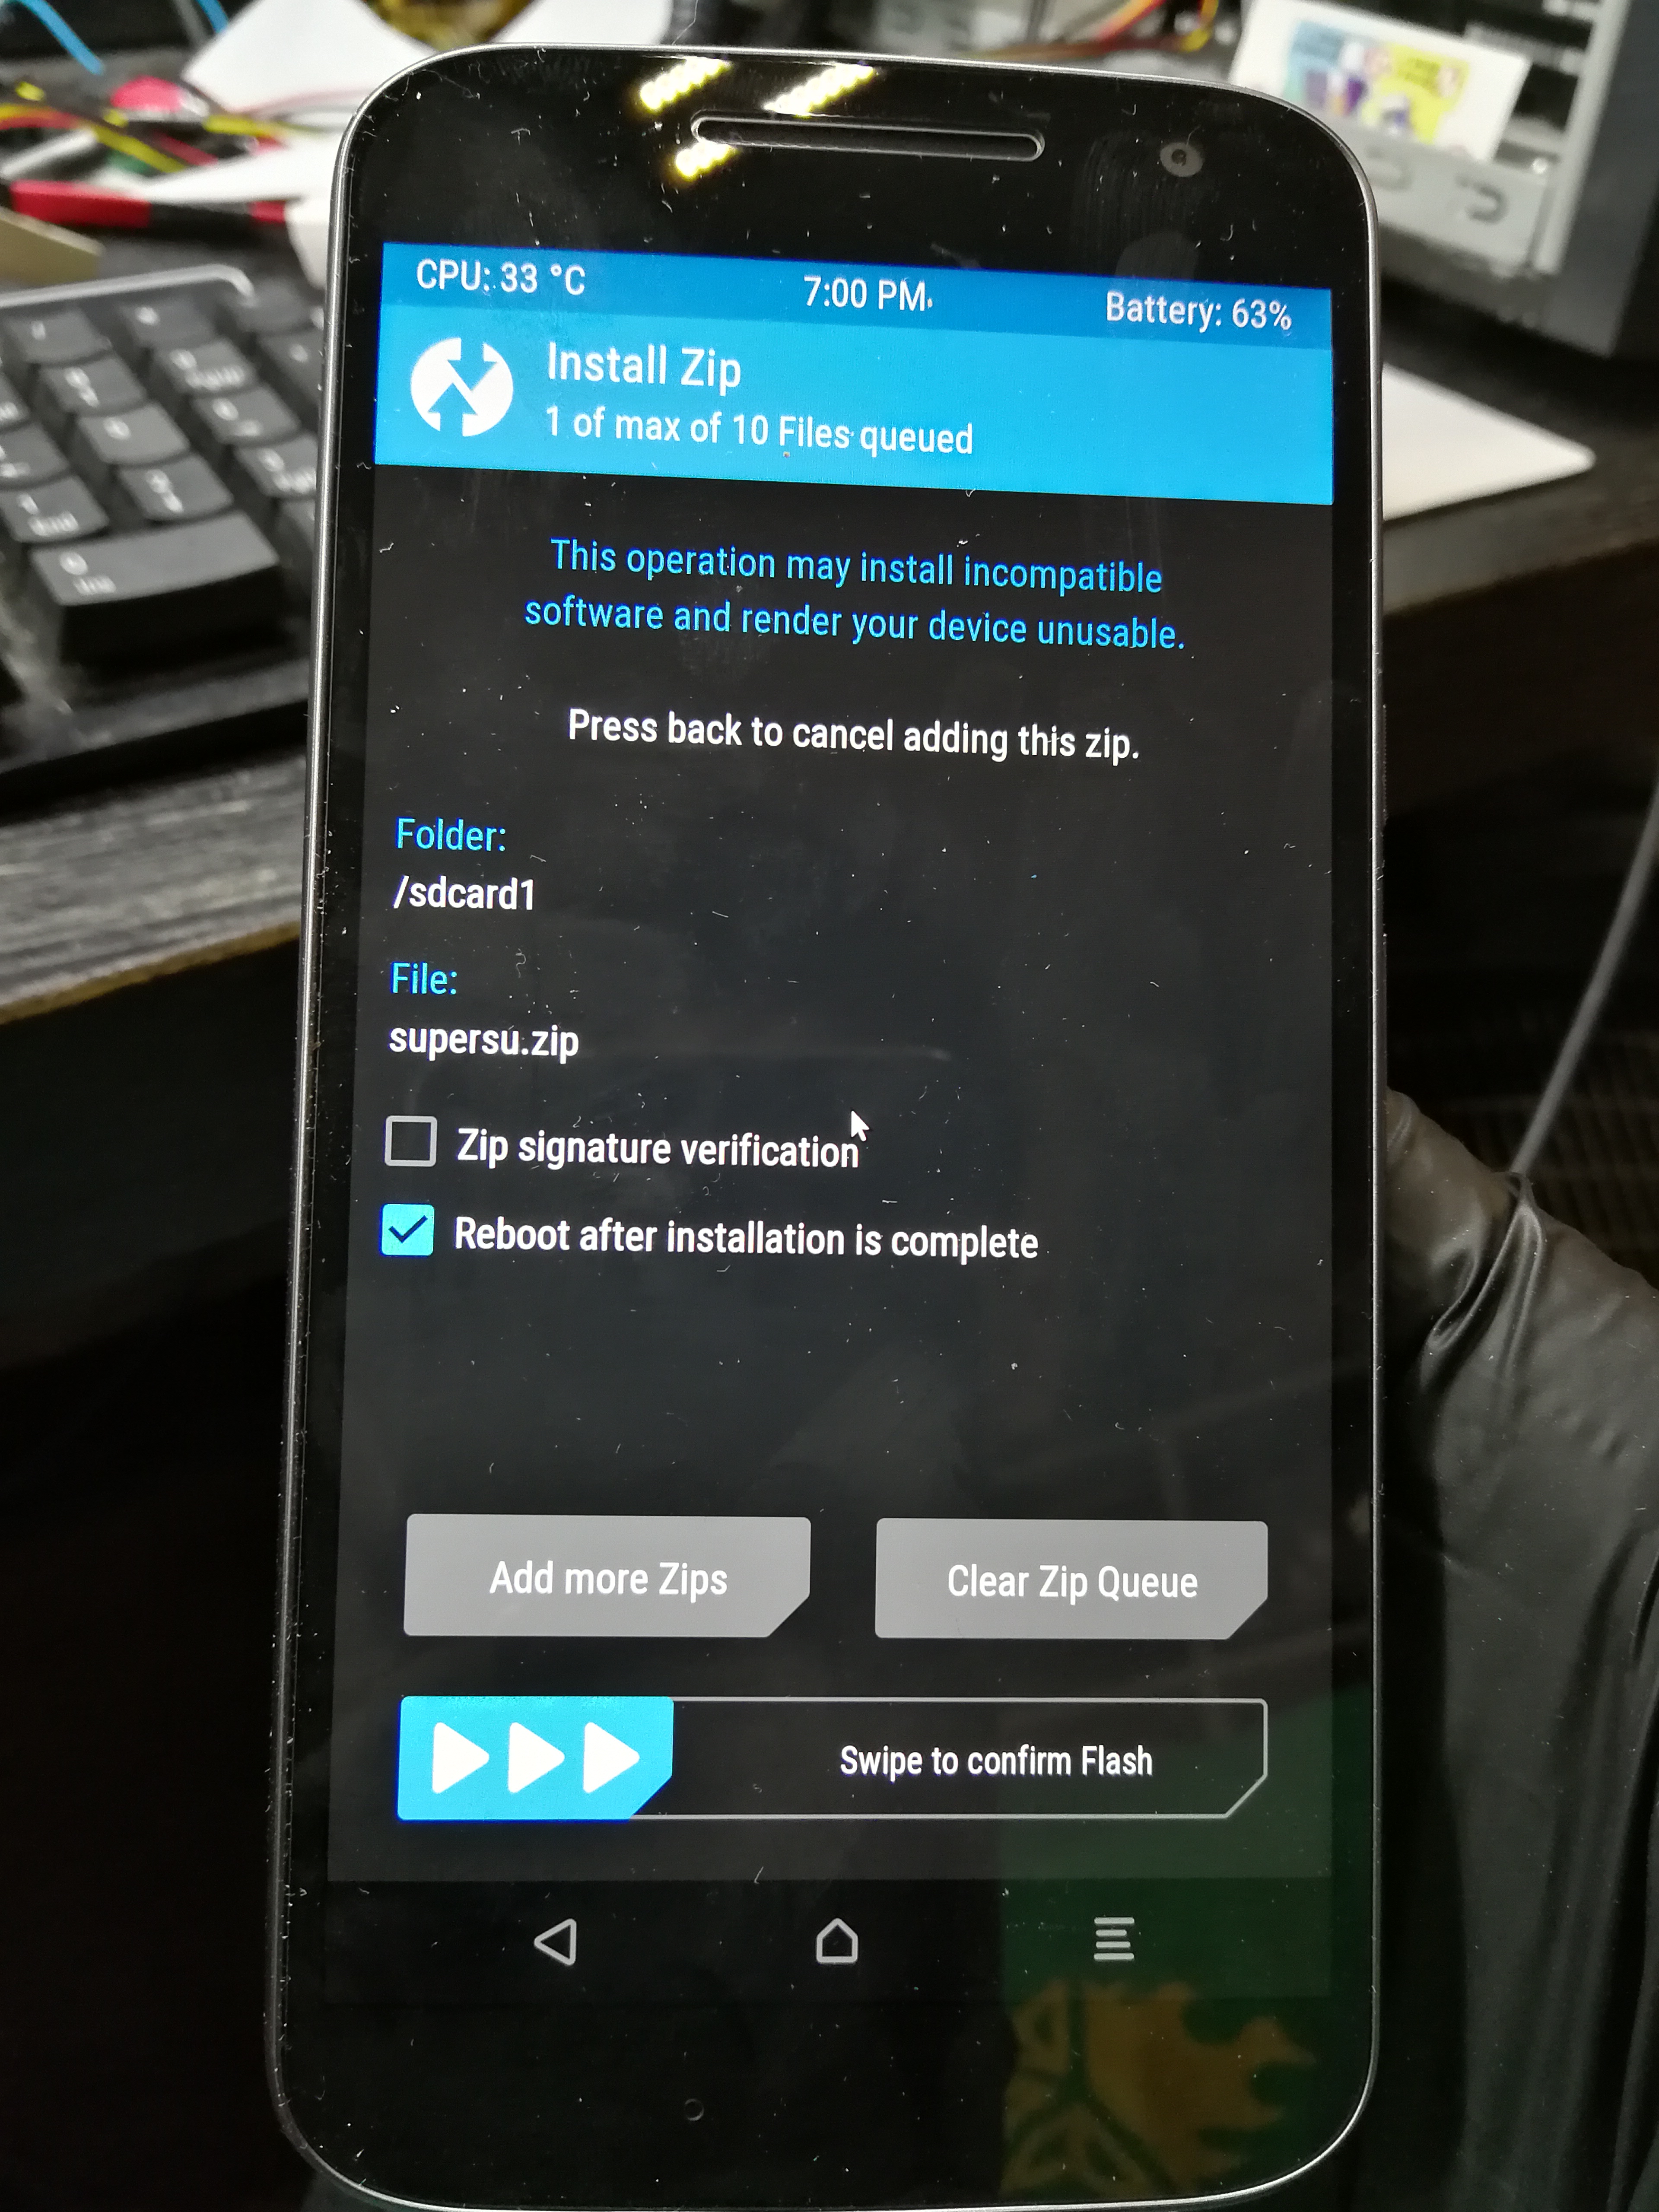
Getting root access with TWRP and SuperSU!
One swipe later and I was officially a super user! I copied over the recovered database folder to a microSD and put it into the phone.
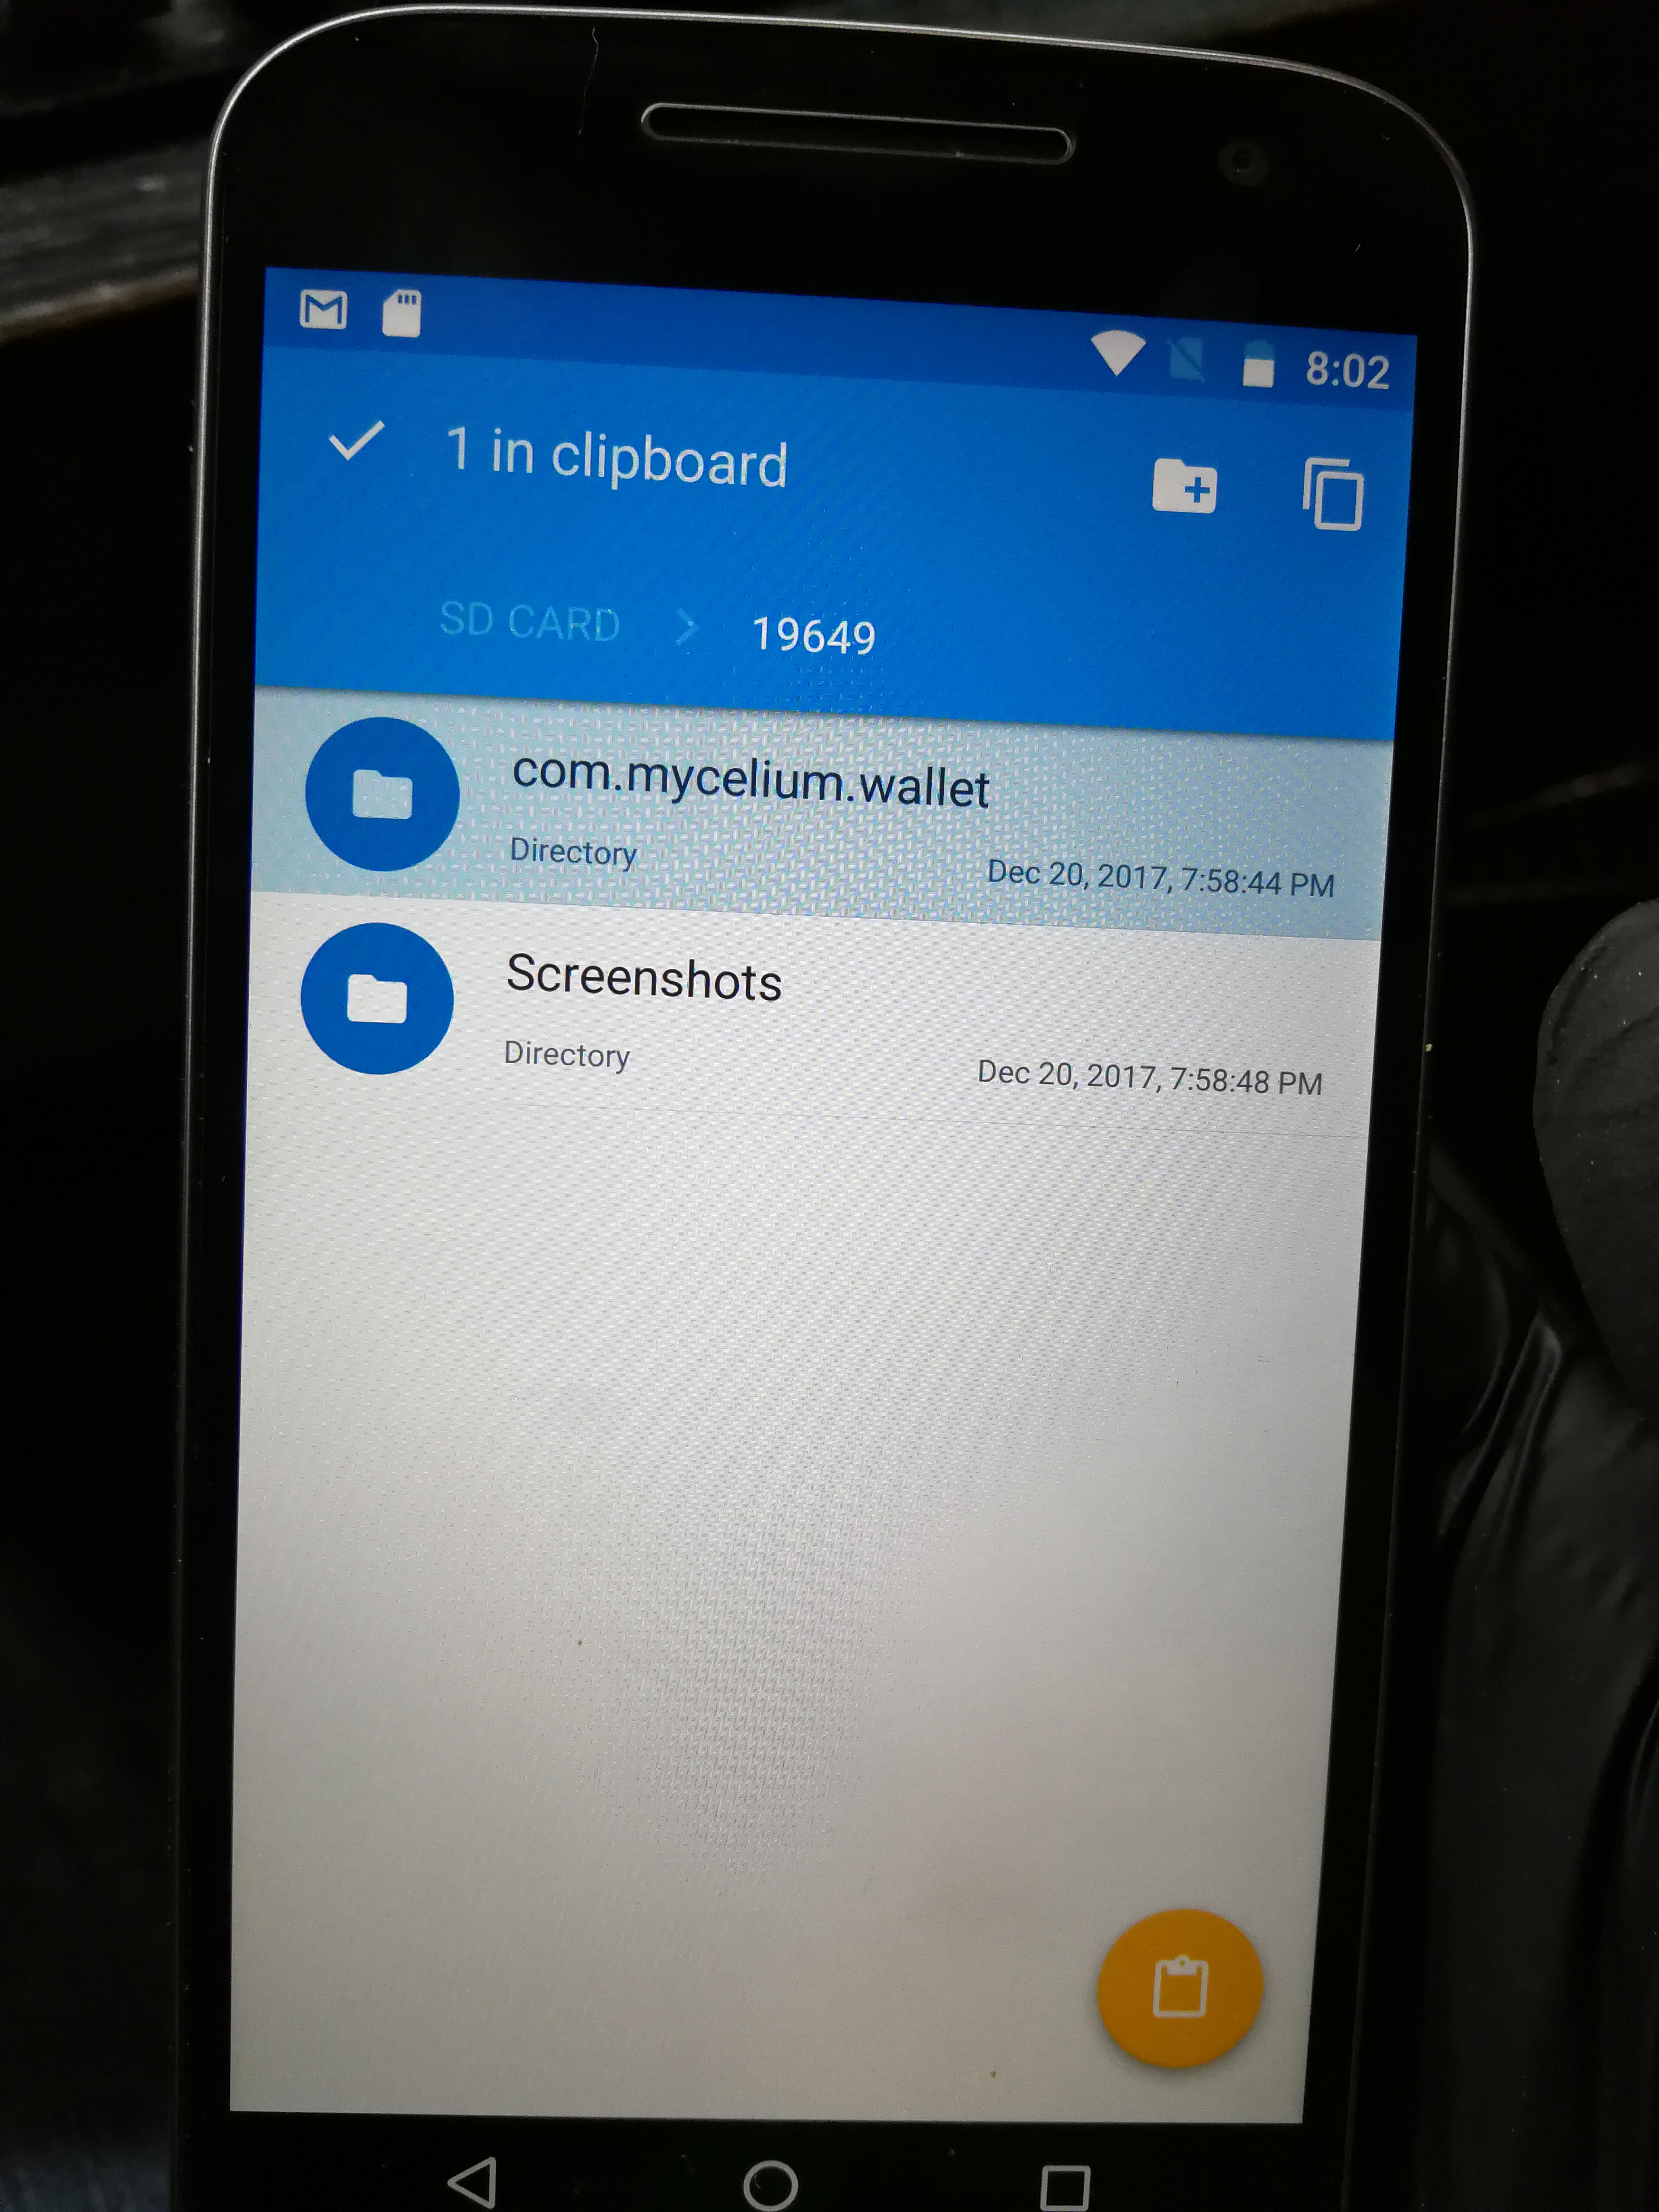
Copying over the recovered Mycelium wallet database.
And then downloaded Mycelium wallet and Solid Explorer from the Play store. Once they were installed I created a new wallet in Mycelium and then navigated to the /data/com.Mycelium.wallet folder in Solid Explorer.
Placing the recovered databases into the Mycelium app folder.
Then the recovered databases can be pasted into the folder. Now, will Mycelium open them?
It works! Crypto lives on 🙂
YES! The wallet has been recovered! I now have full access to the private keys and can transfer them to cold storage or another wallet. That .5157 BTC wasn’t worth more than a few hundred dollars when the LG G3 was first released in 2014, but it certainly makes for a worthy recovery job today!
For better or for worse, I suspect the main reason why I was able to recover the wallet relatively easily once I had access to the old filesystem was due to: a) That Mycelium does not encrypt the private keys even when a PIN is set, or b) The decryption keys are stored with the private keys.
While it is less of a problem now that Android encypts the filesystem by default since Nougat, if a root exploit was to be released today then it would be extremely easy to extract the database from a victim’s device and copy it over to an attacker’s device, even with a PIN set in the app. Therefore I would caution all Mycelium wallet users to keep their devices up to date with security patches and don’t root them either.
BTC donations: 14YEMTwwbp1ELHqrxgRzt6uV1cE8pQZoFq
ETH donations: 0xb3de582ac74d3b08f1b667b165e71cbc0290f415
ZXW is a valuable tool for logic board repair, whether you are repairing an iPhone, iPad, or Android device, having to go back to playing “Where’s Waldo” with PDFs when your ZXW tool stops working feels like a return to the stone age. But never fear! We are going to help you minimize your downtime and troubleshoot the most common ZXW errors below:
NO NETWORKS FOUND!
No networks found dialog box.
This error occurs when your computer can’t communicate with the ZXW servers. Most commonly this is because the server is down on their end, in which case you will just have to wait unfortunately. Other times you can try switching to a different server, or check that your internet service provider and firewall aren’t blocking the connection.
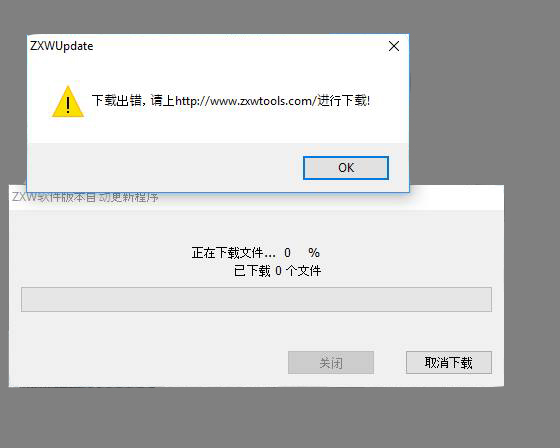
ZXWUpdate popup with loading bar that never loads
ZXWUpdate dialog box in Chinese with empty loading bar.
This one can look scary at first, but it really is just ZXW telling you that you need to update your software to the latest version. To do, go to the ZXW website (zxwtools.com) and look for the latest version on their download page. Here you can select the latest version at the top of the list and download the update by clicking on the button labeled ”下载“ with the download icon on it.
After you are redirected to the ZXW download page, click the download button above.
Once you have finished downloading the latest ZXW software, simply extract the software from the RAR file (7-Zip works great) and you will be good to go again!
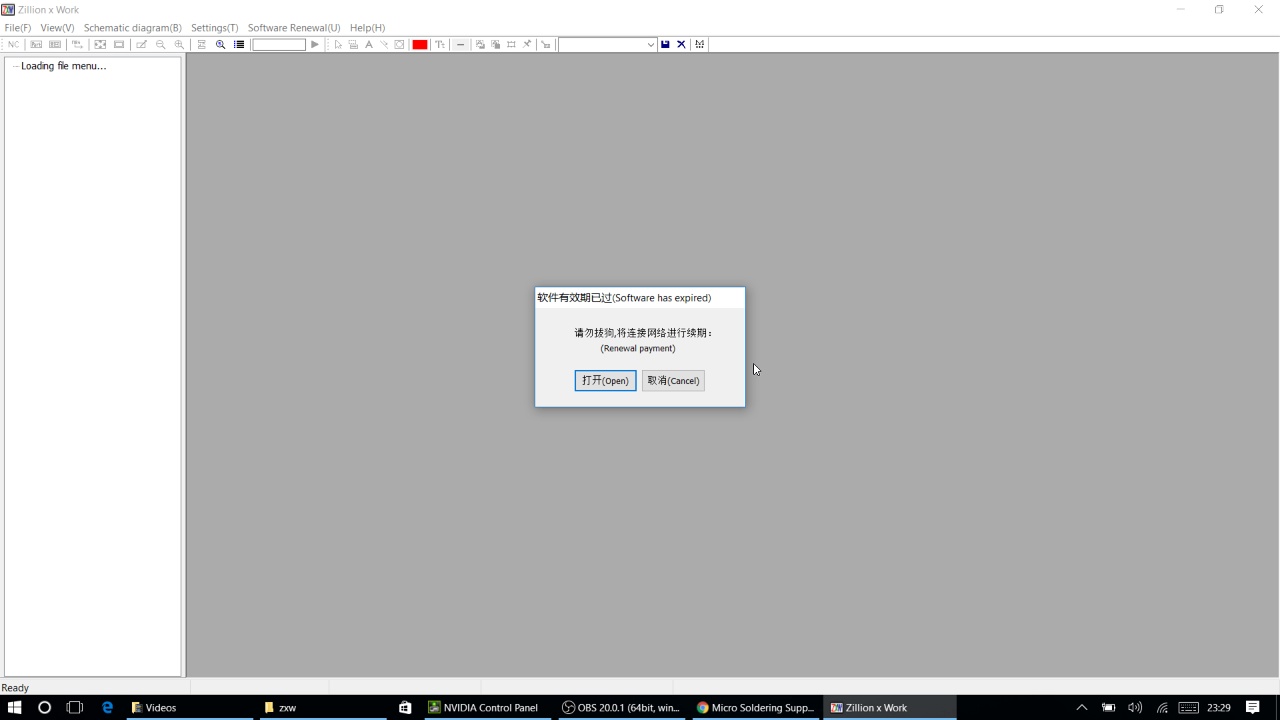
Software has expired
You will have to renew your ZXW tool subscription to continue using the software.
This is the only case where you will have to renew your ZXW tool subscription in order to continue using the software. However, doing so can seem daunting at first. Clicking on the “Open” button will bring you to a web page completely in Chinese and ask you to pay with a Chinese service, which if you can’t read will seem like an impossible mission.
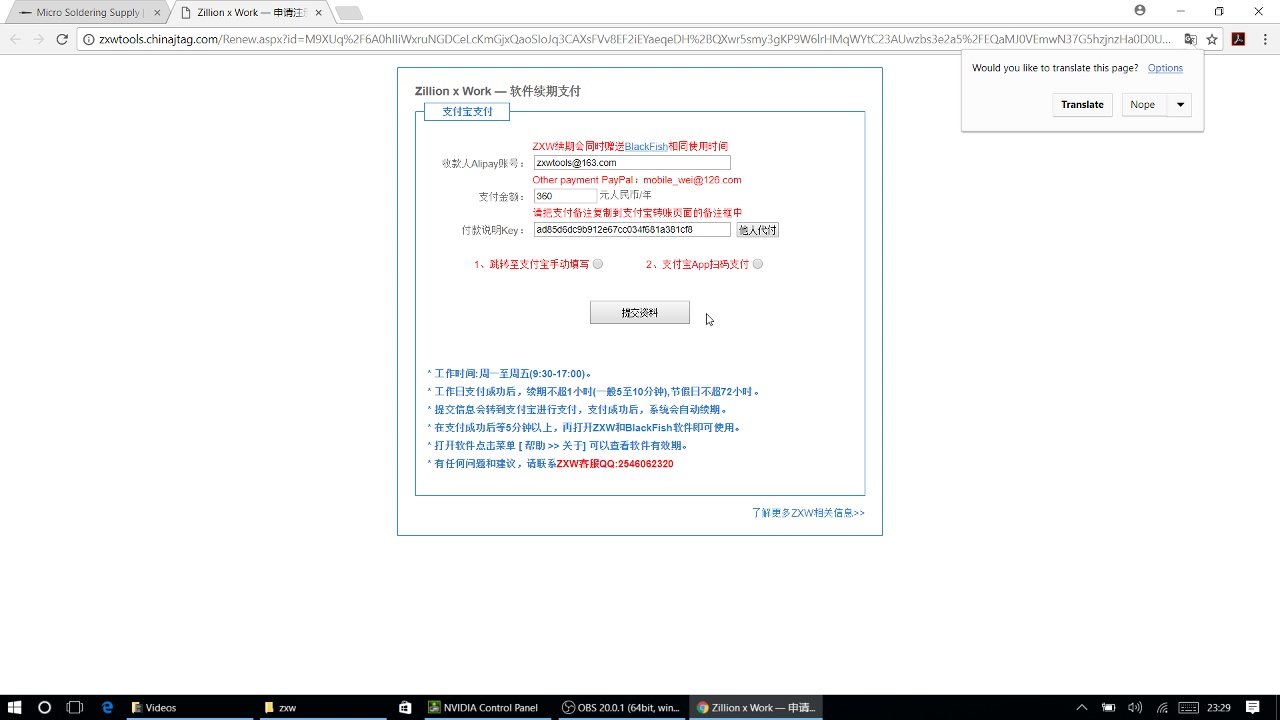
Not the easiest way to make a payment…
Thankfully we now offer an easy and quick way to renew your ZXW tool subscription through our store! We accept all major credit cards as well as Paypal, and you don’t need to know any Chinese to get it done.
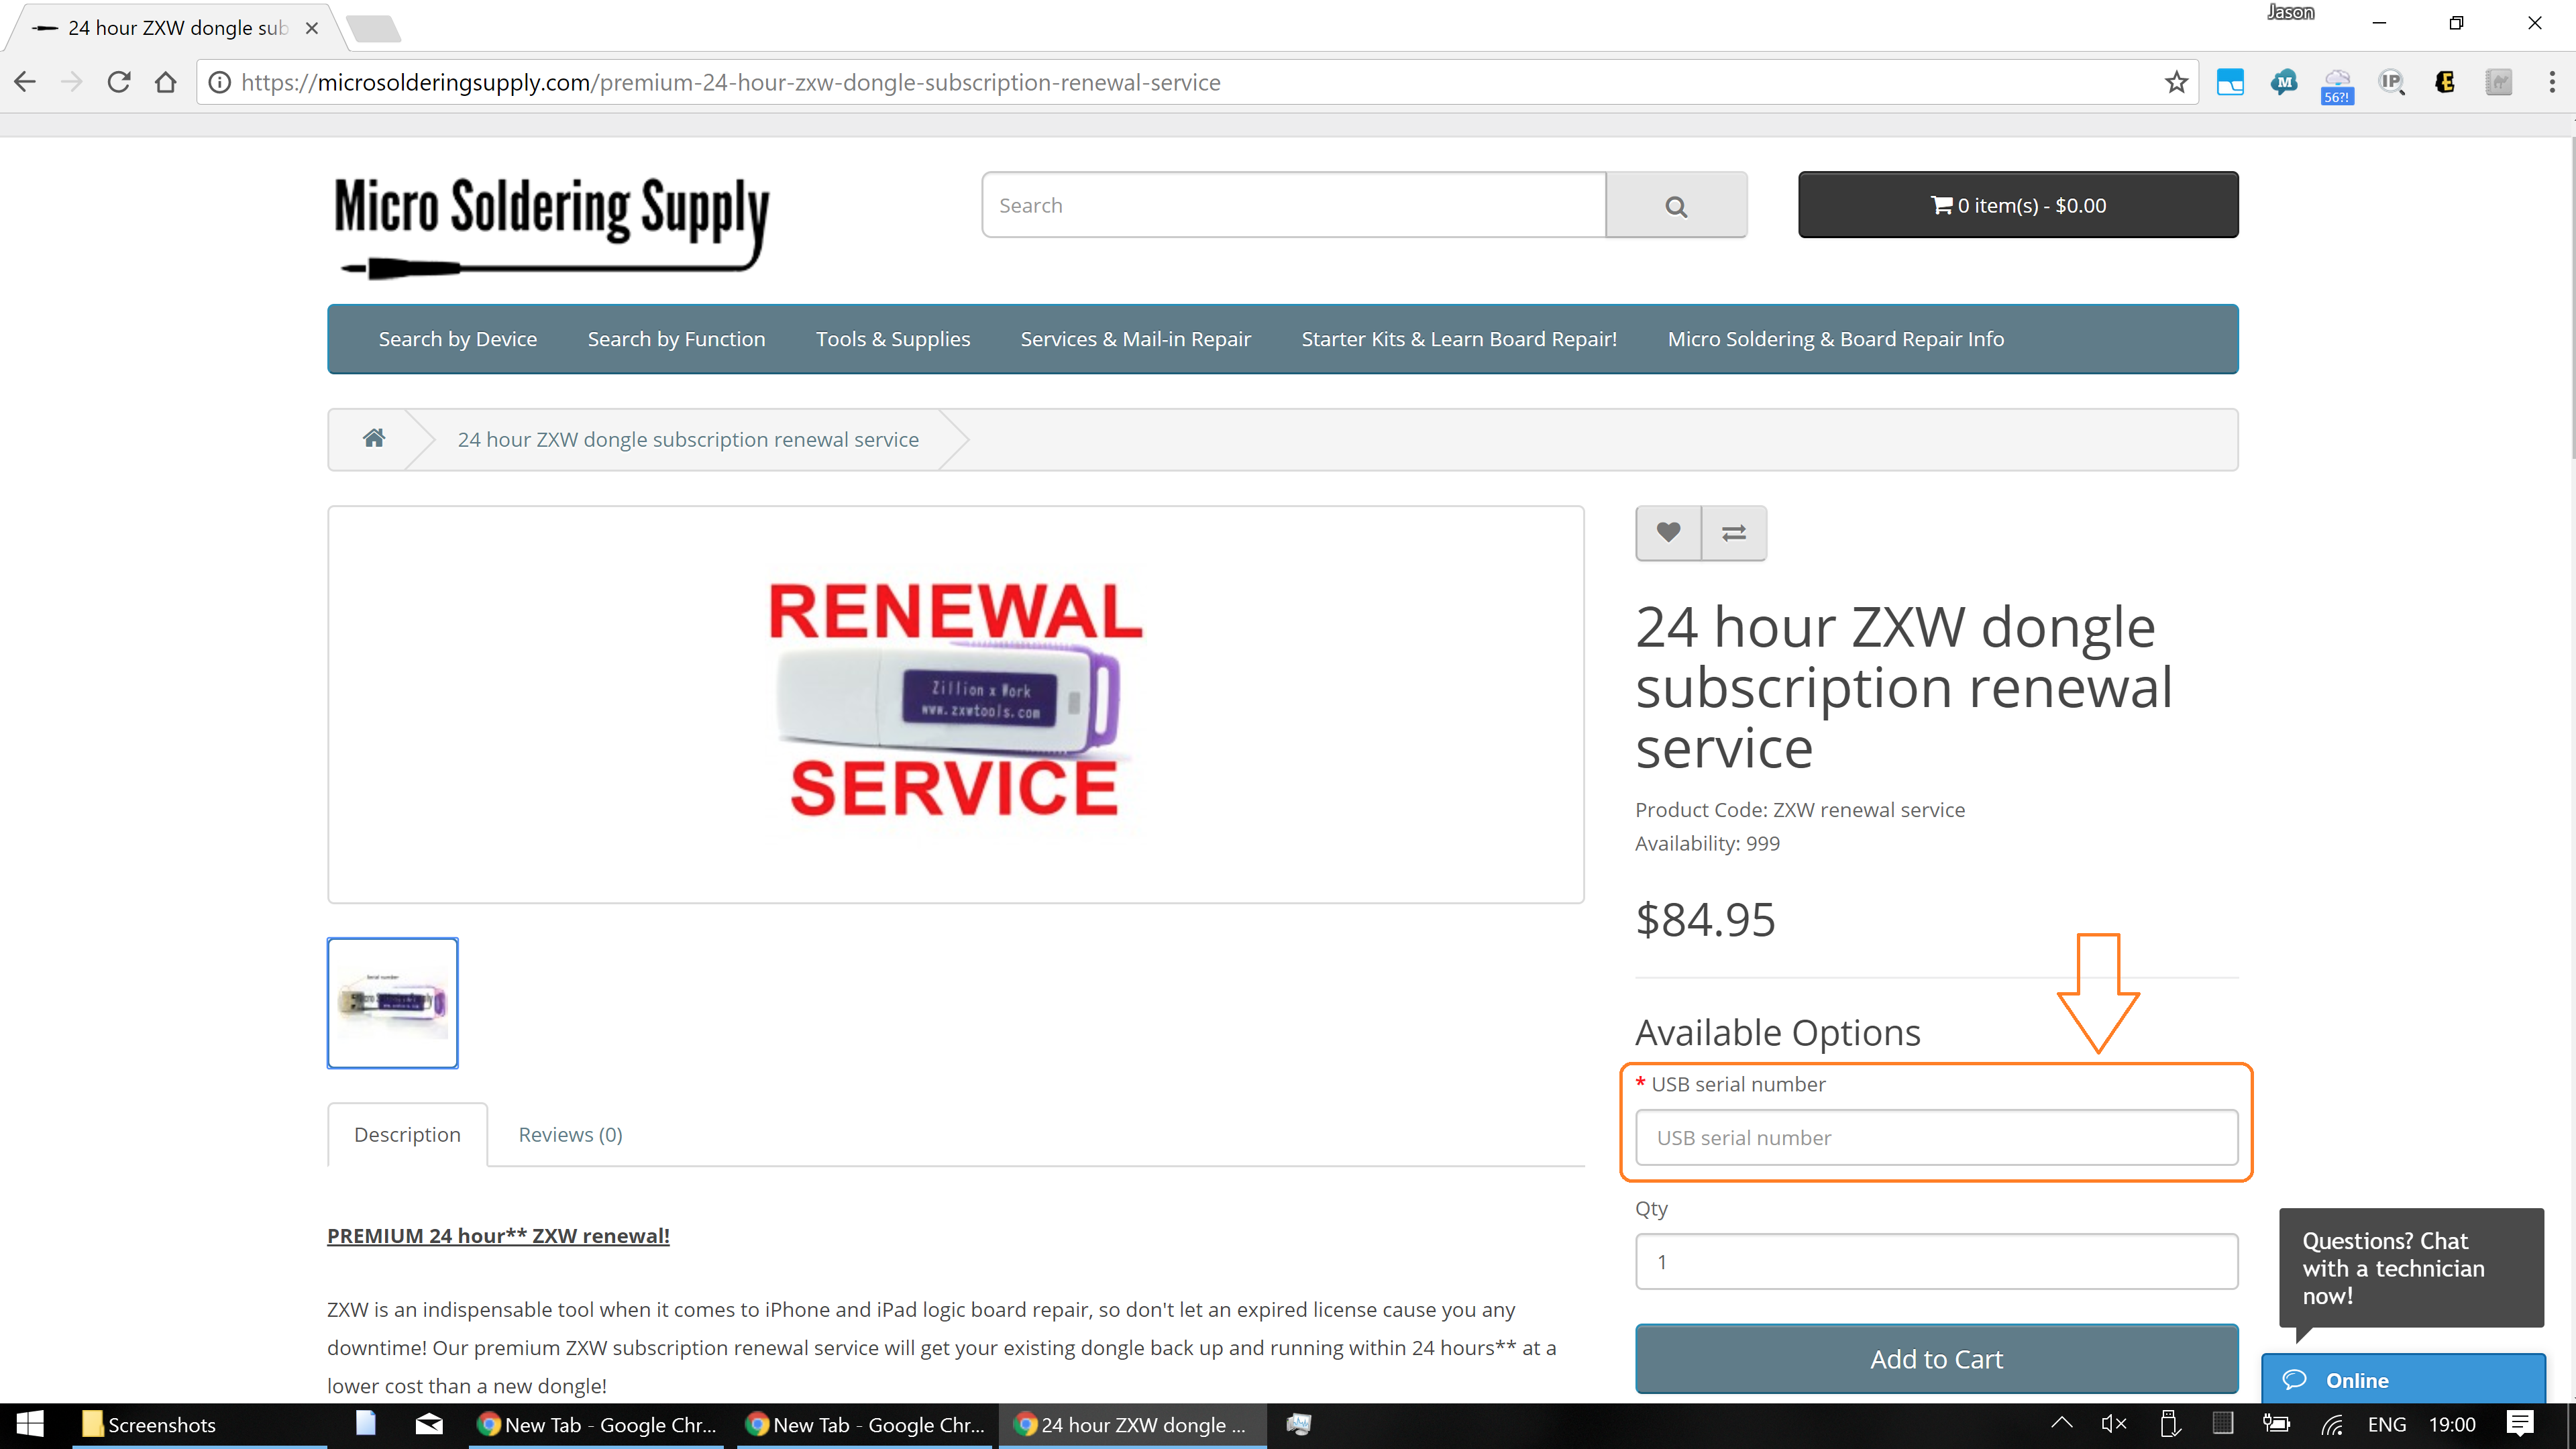
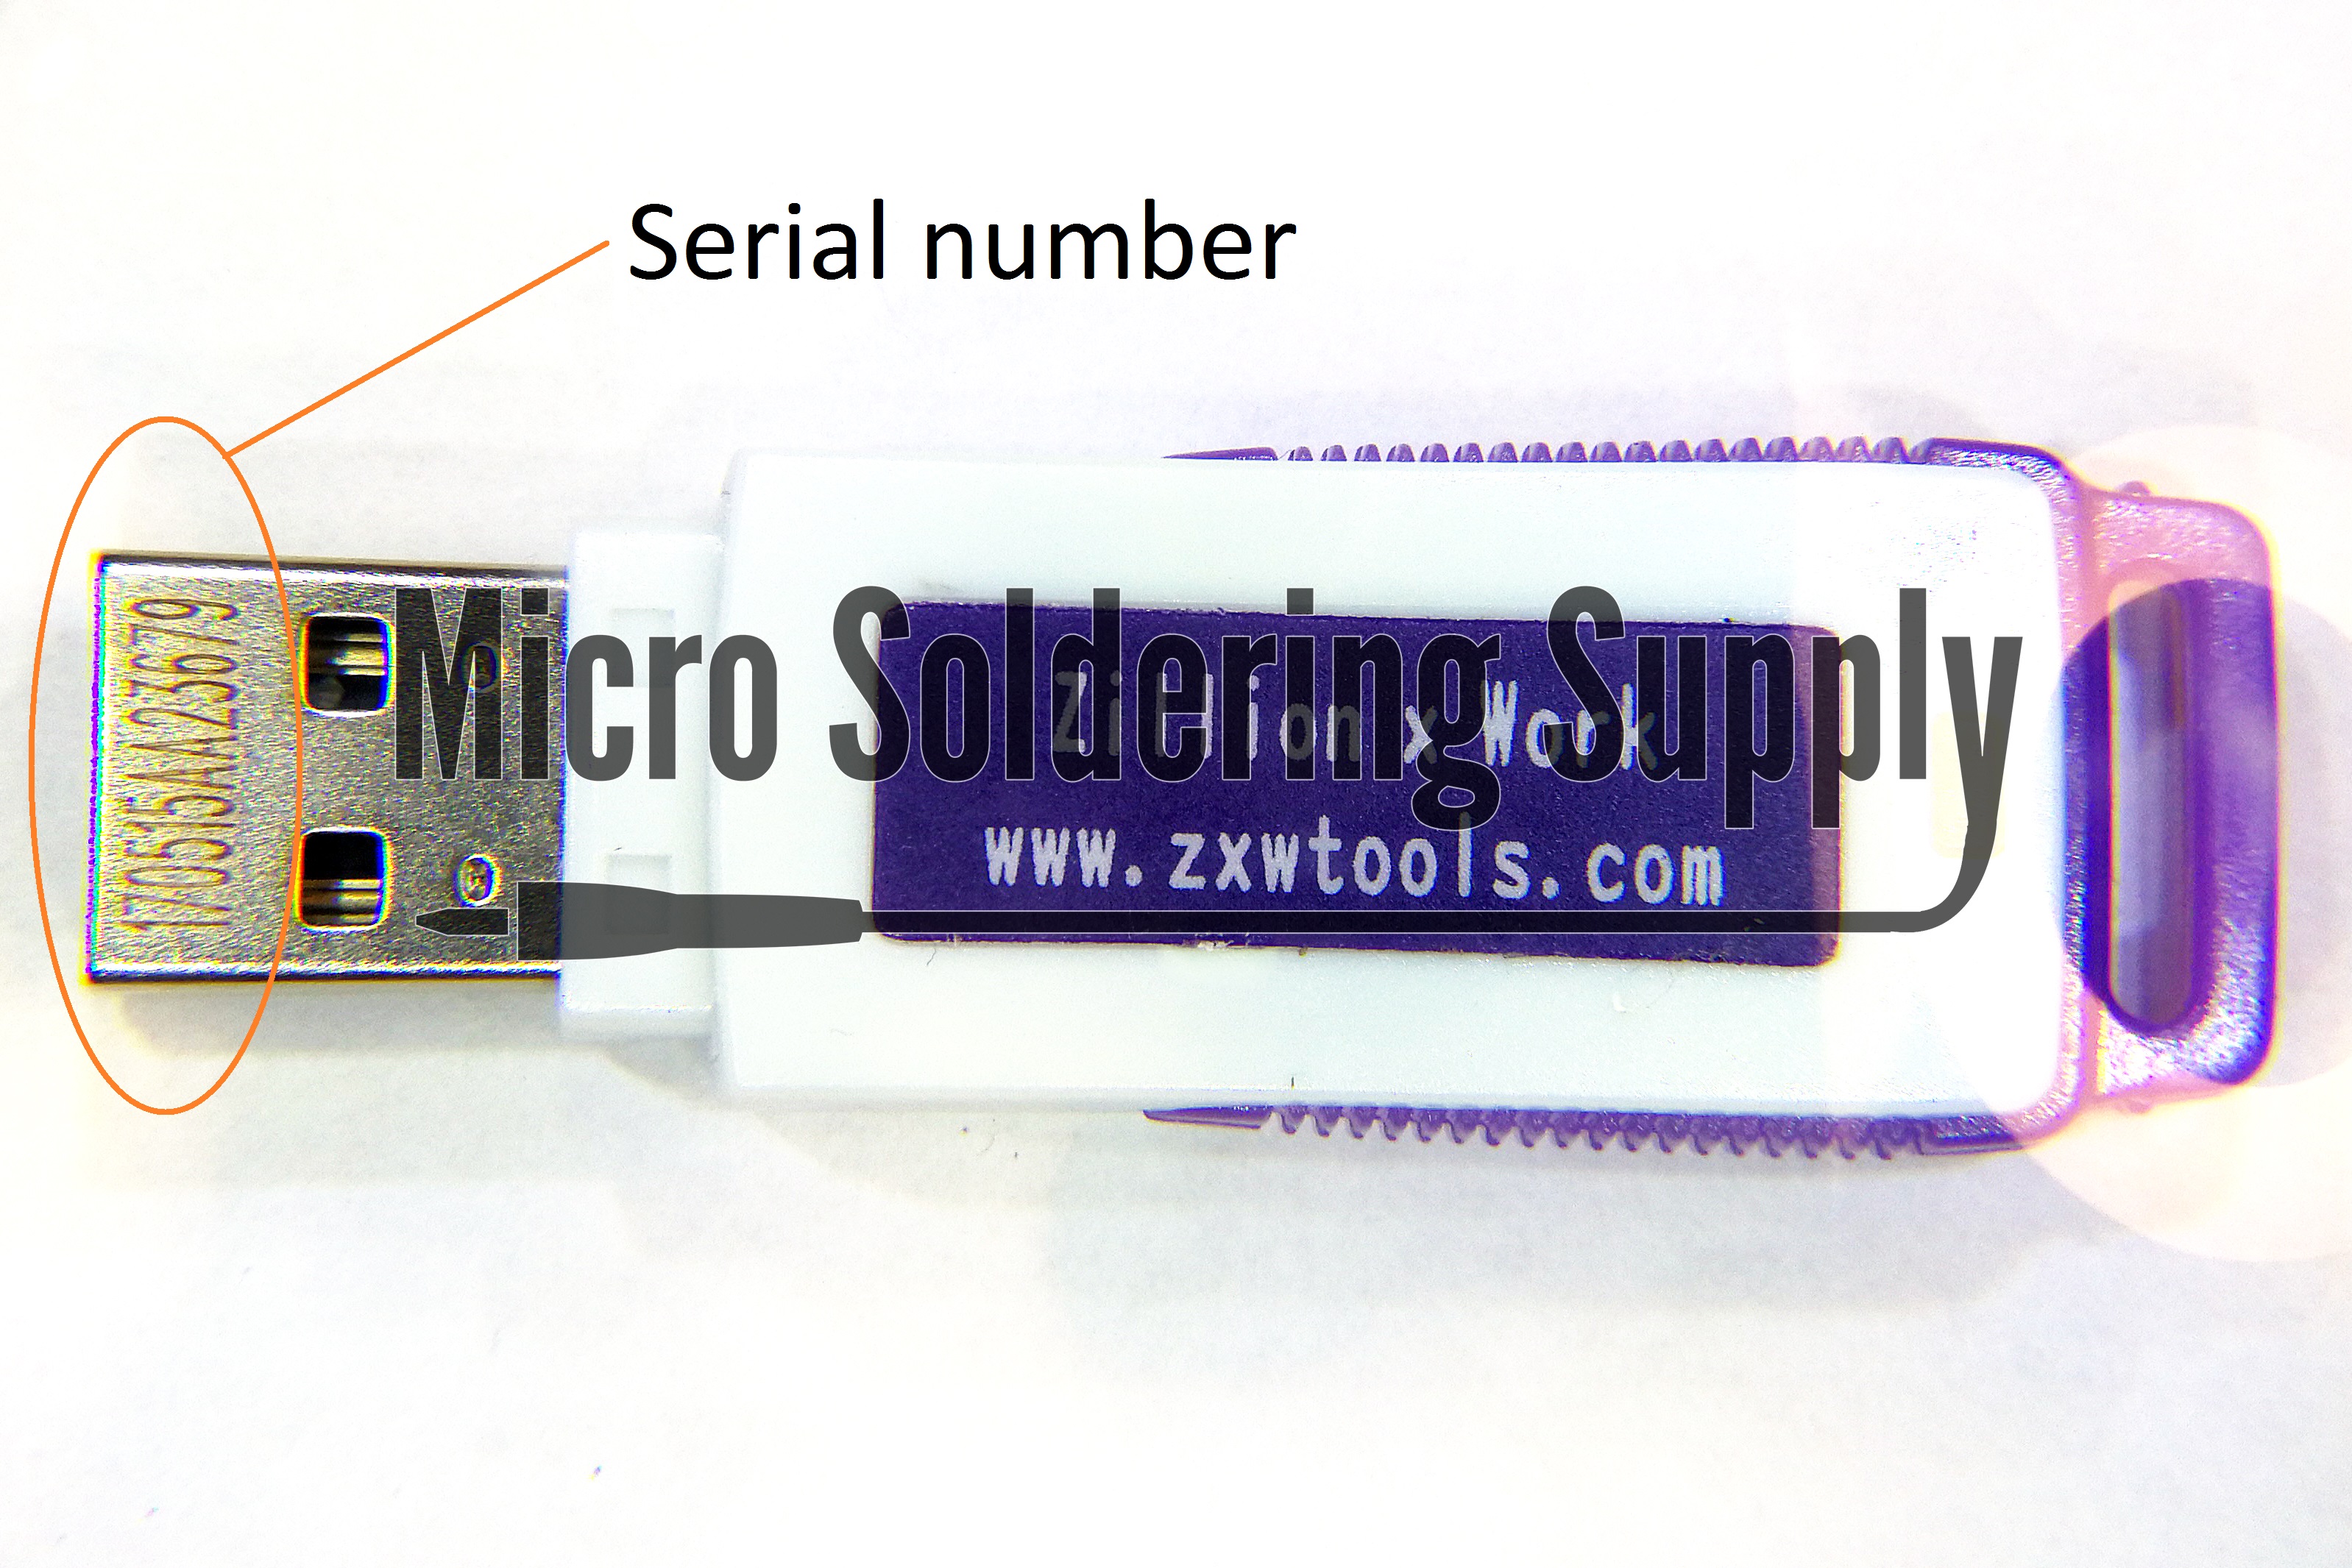
Our process is effortless and meant to minimize your downtime so that you can get back to work ASAP. Simply add your ZXW tool serial number engraved onto the USB end of the dongle to the form on our website and then proceed to checkout, and we will notify you as soon as your subscription has been renewed.
This serial number is all you will need to provide to us to renew your ZXW tool subscription.
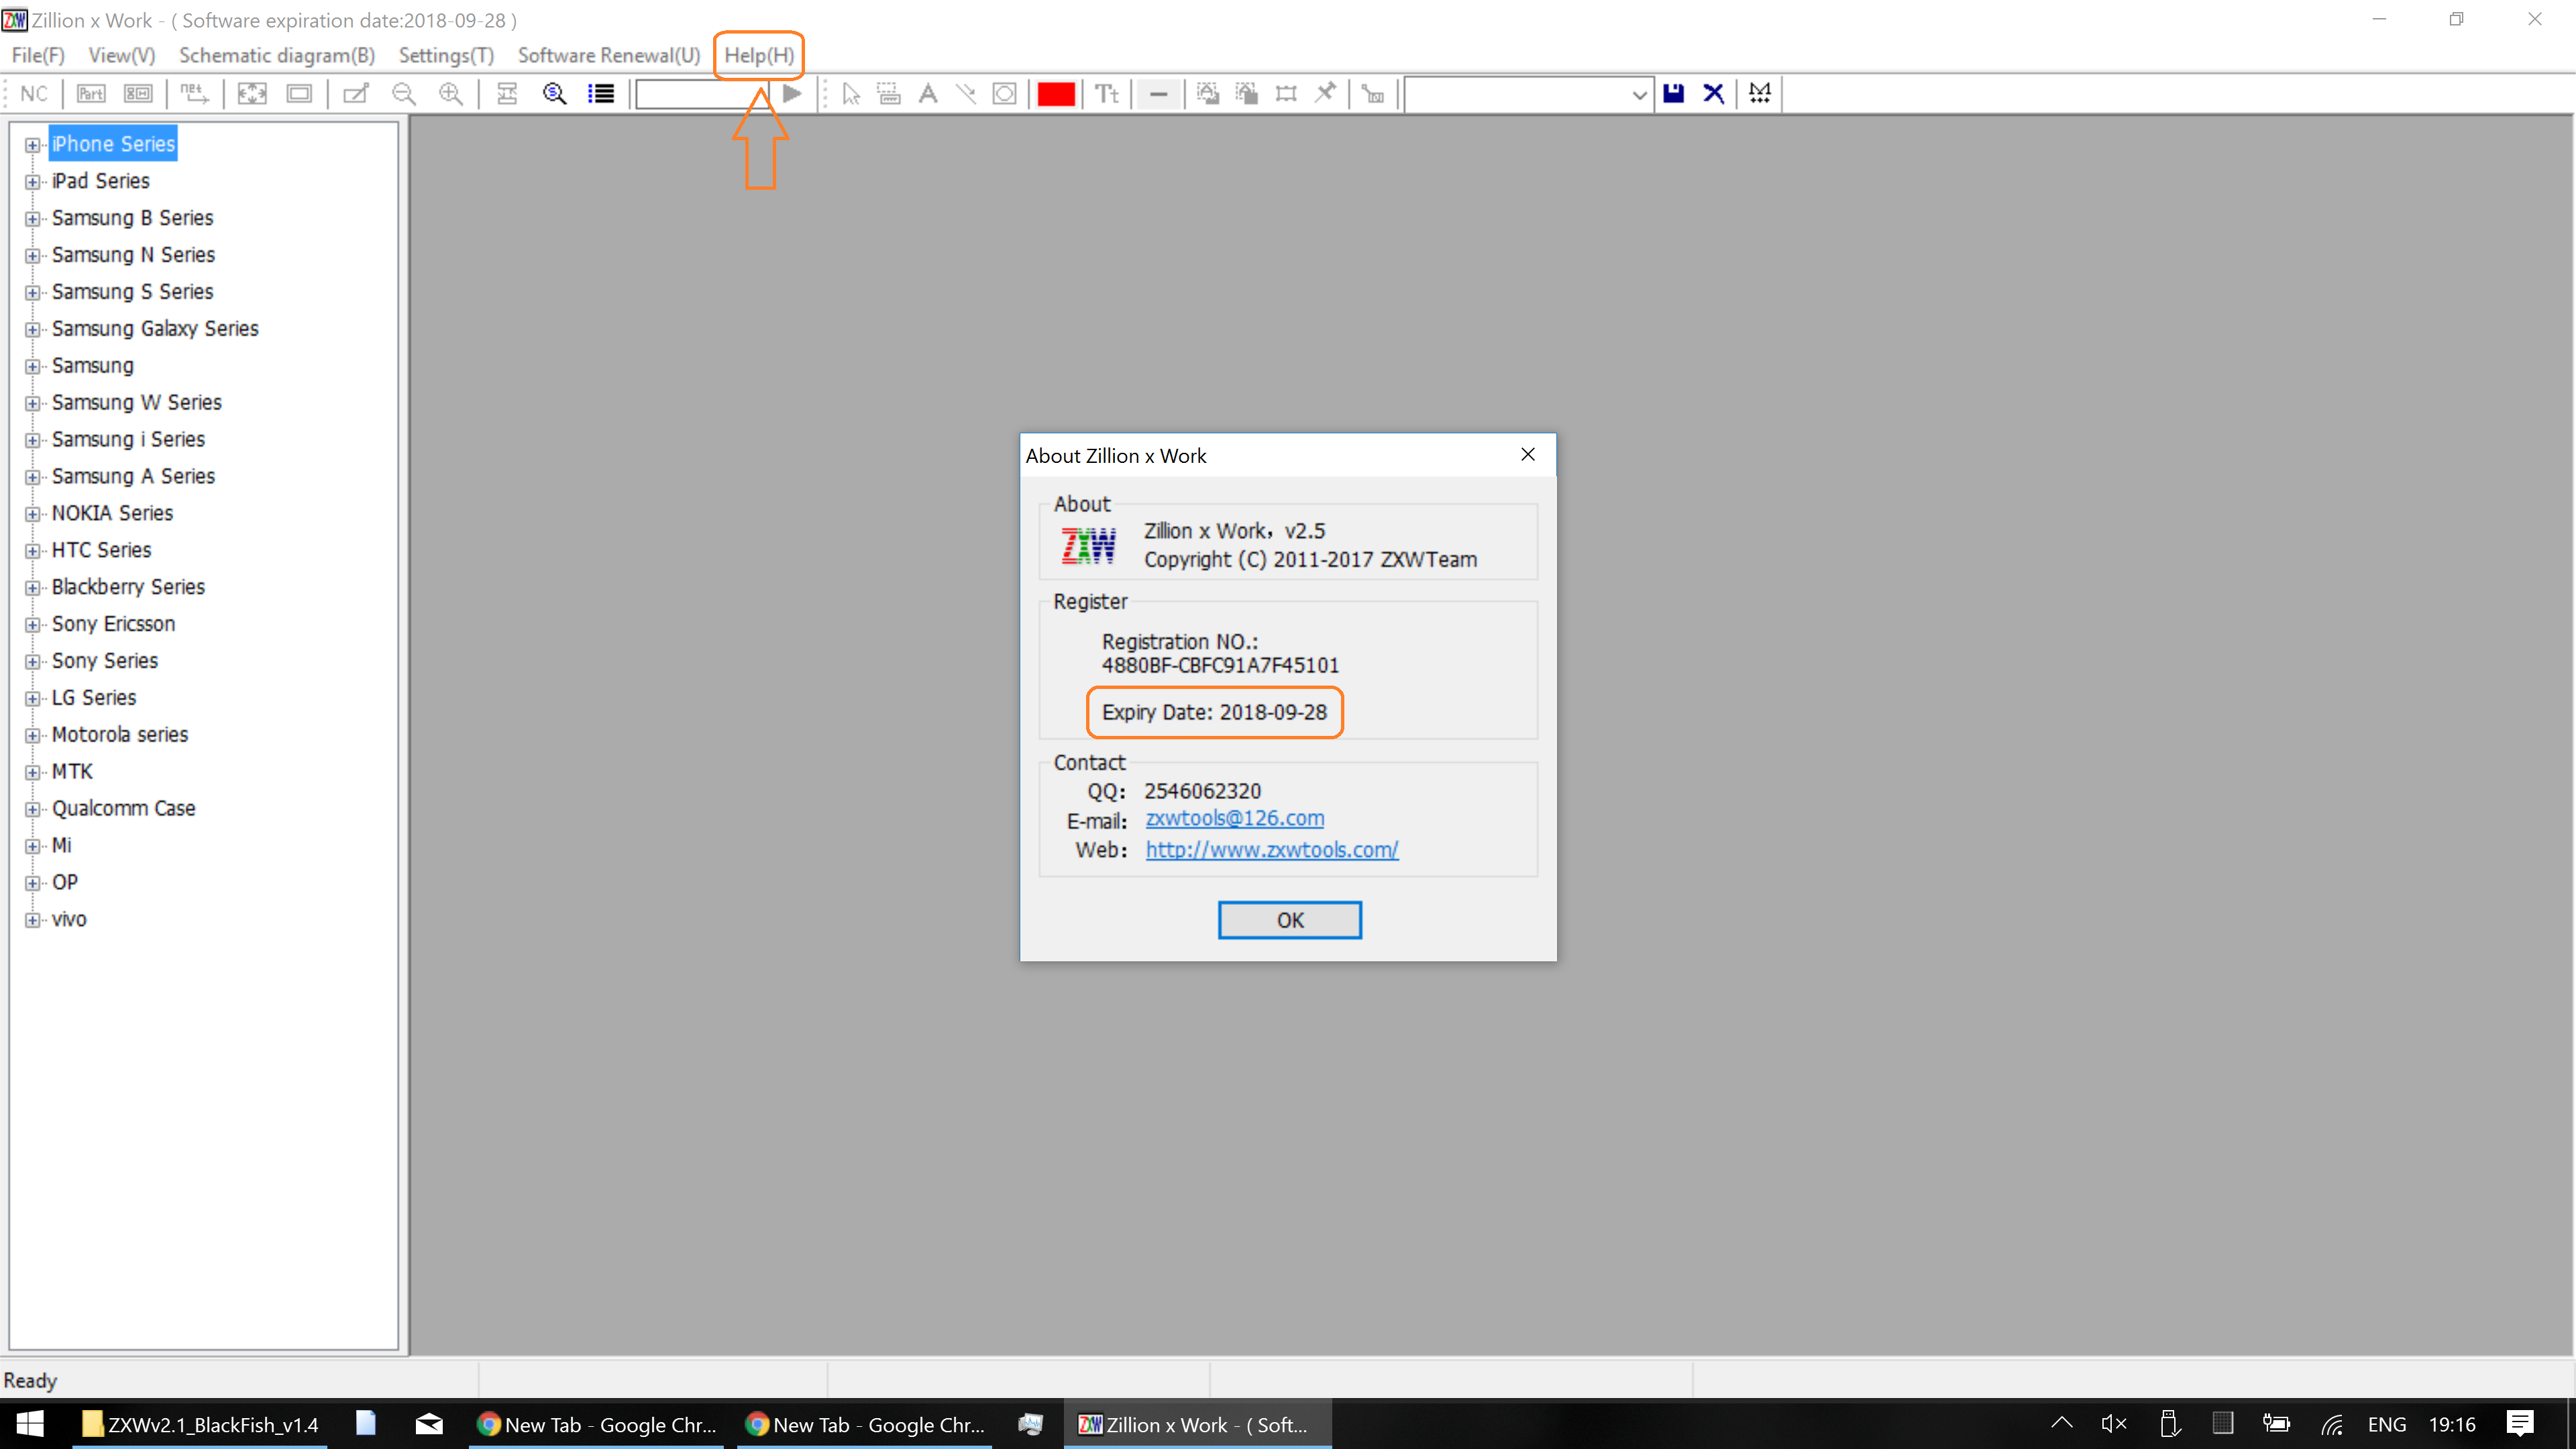
Once your subscription has been renewed, you can continue using the ZXW software like normal for another year. You can also check when your subscription will expire by going to the Help menu -> About ZXW and looking for “Expiry Date” in the dialog box that pops up. If you are on the latest version it will tell you in the title bar at the top as well.
Check your ZXW tool subscription expiration date by going to Help -> About ZXW at the top.
Renewing your subscription is a much better alternative to ordering a replacement dongle and waiting for it to arrive in the mail, which could potentially set you back days or weeks in repairs. Our service can get you back to business in under 24 hours and for less than the cost of a new dongle! And if you purchased your original dongle through Micro Soldering Supply, as a thank you we offer an added bonus of a 15% discount on your subscription renewal.
Hopefully you can now use your ZXW software without any issues! And if you are still having issues or know of any solutions to issues that we missed, leave it in the comments below!
To work with microscopic components, you will need a microscope to see. Physical examination is the first place to start with any repair job, as that will quickly tell you the technician what likely is or isn’t the problem with little thinking on your part.
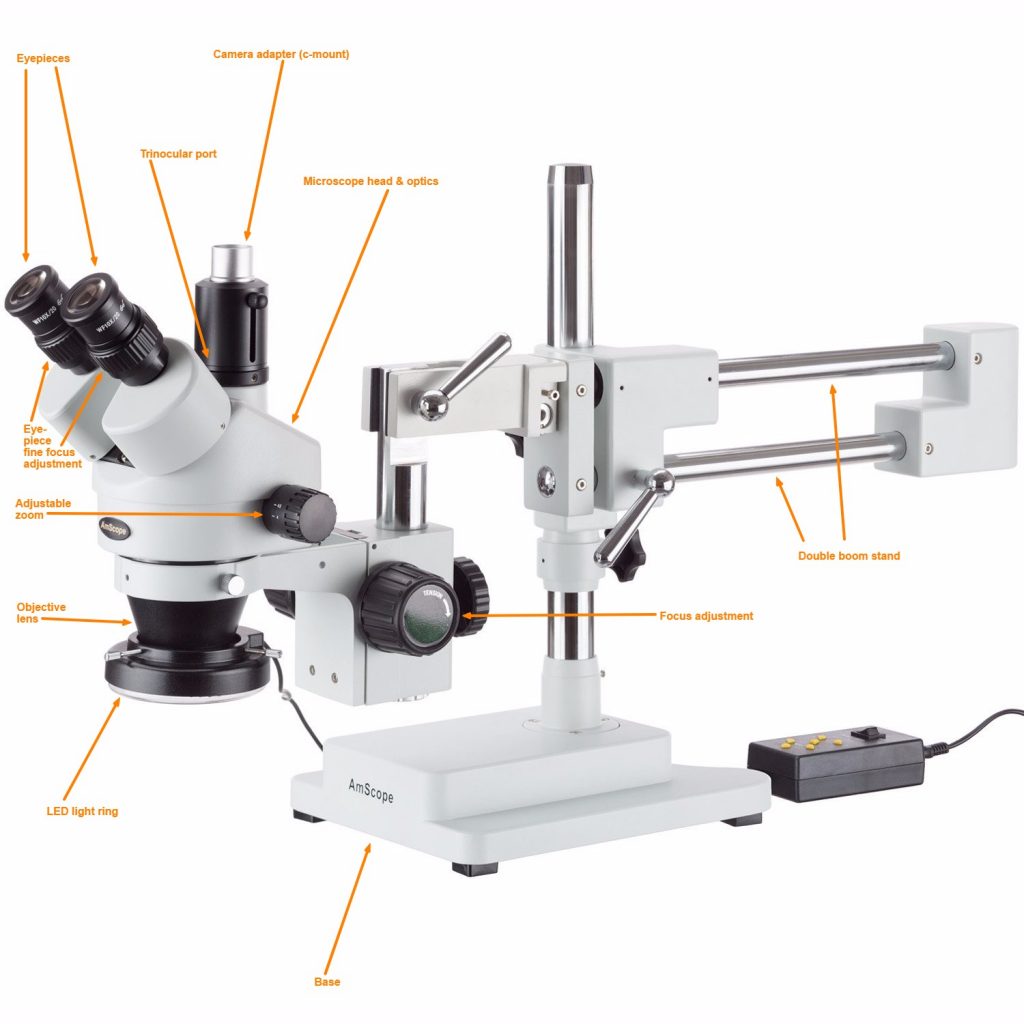
A good microscope generally should cost around $400-800 new. We highly recommend the Amscope SM-4TZ-144A ($529; amazon.com) for a first microscope. This microscope has almost all the key features needed to easily see and work with microscopic components on iPhone and other smartphone motherboards, while also is extremely affordable and will suit the needs of most repair shops for the foreseeable future.
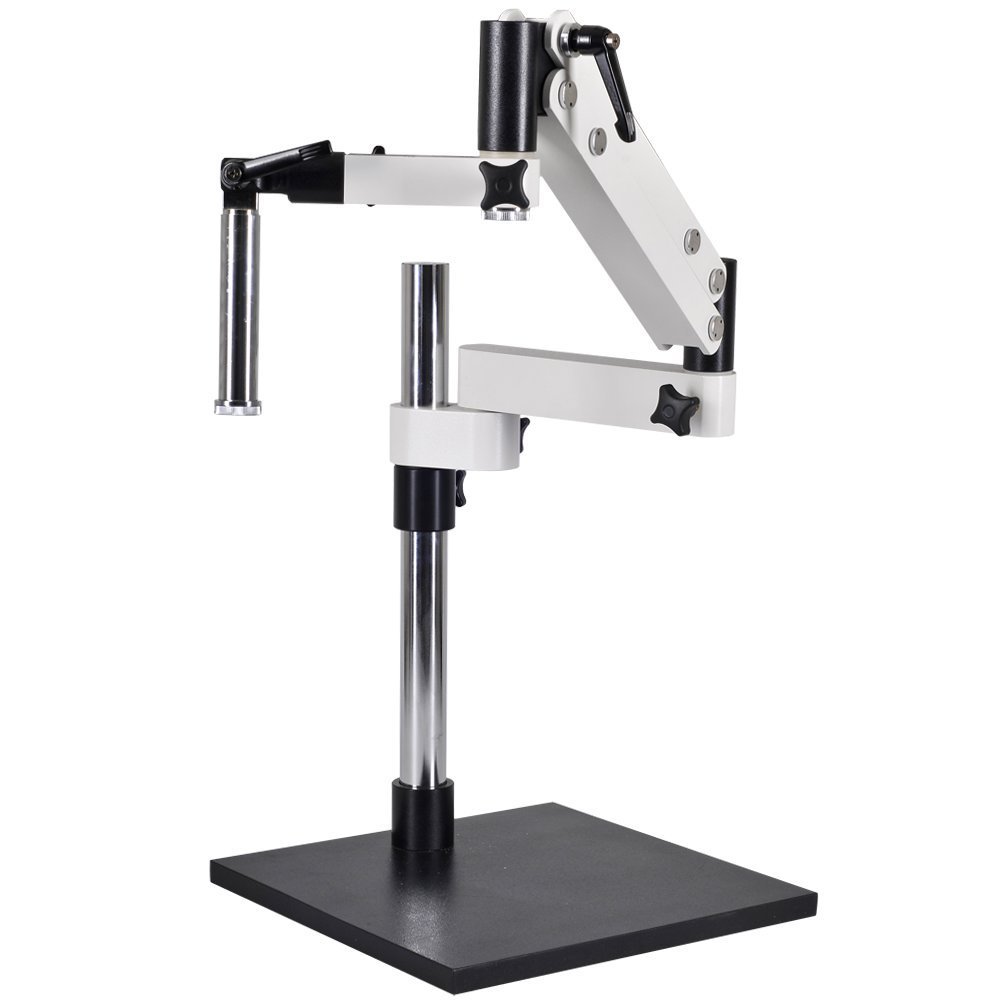
The Amscope comes with a heavy double boom stand, which we prefer over articulating and single boom stands for a few reasons. Firstly, many beginners tend to opt for articulating stands because they believe that it allows them to have infinite flexibility. However, we have found that most articulating stands fail to suit our needs in a few respects – articulating stands are notoriously unstable and suspect to vibrations from surrounding equipment like hot air stations or even other people walking by, making it impossible to see clearly through the microscope. In addition, articulating stands end up being less flexible than boom stands because they are hard to keep in one position when working – they tend to drift up and down and side to side so it is impossible to position the microscope exactly where we want it for that particular motherboard that is being worked on.
An articulating microscope stand like this tends to transmit vibrations and become very unstable during usage.
Single boom stands are generally cheaper than double boom stands, but also have their disadvantages. Because there is only one cylindrical arm connecting the microscope head to the base, if that arm does not have a locking pall then it is allowed to rotate around its axis, and likewise the head of the microscope will rotate as well. This becomes annoying because a lot of the time we would quickly like to be able to move the head of the microscope in and out of the base to inspect, but with a single boom it must be locked and unlocked each time we move it in or out. Double boom stands allow us to leave the arm unlocked without the head rotating so that we can quickly move it around when needed.
The single boom allows the microscope head to rotate around its axis on its own, which quickly becomes an annoyance.
With the Amscope we also find its variable zoom feature valuable. Lower end microscopes have a fixed zoom, which just isn’t practical for working with a variety of different devices. A variable zoom of around 0.5x to 4x or 5x allows us to be able to choose our field of view and magnification for what we are working on, and be able to zoom in to inspect joints and solder balls closely when necessary.
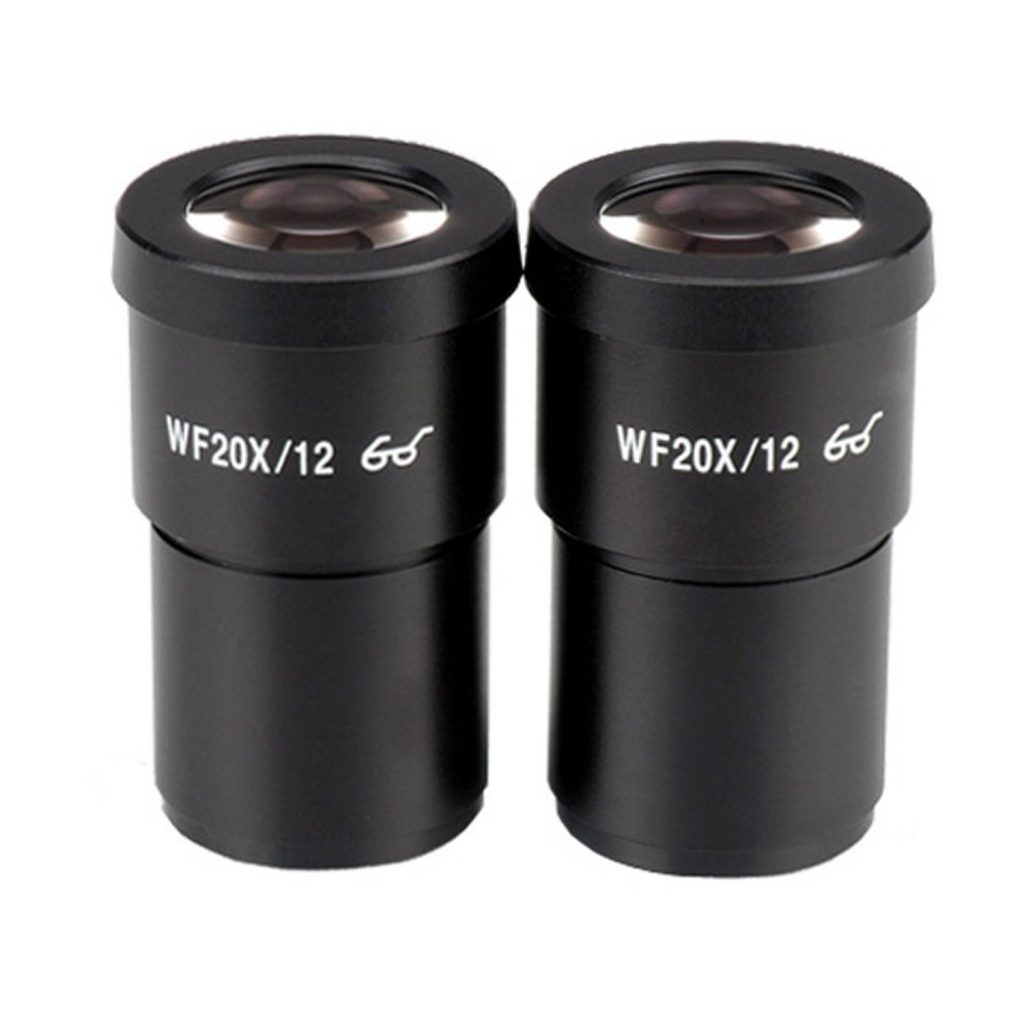
The eyepieces of the microscope are what generally provide the most magnification. A good quality microscope will have modular eyepieces that can be swapped for higher or lower magnification. To calculate the total magnification power of your microscope, multiply the eyepiece magnification by the objective lens magnification:
With the Amscope, it comes with 10x eyepieces and a 0.45x-4.5x objective lens. This gives us a total magnification power of 4.5x-45x. The eyepieces also should come with rubber eyecups that some people find helpful to rest their eyes on. Also make sure to adjust the eyepiece width so that you can see through both eyepieces at the same time without one going black, then fine tune the focus on each individual eyepiece by closing one eye and turning the focus knob on the eyepiece until the picture is clear.
Working distance must also be taken into consideration when choosing a microscope, as it is extremely important to be comfortable when working under the microscope for prolonged periods of time. Working distance is generally described as the distance between the workpiece and the objective lens of the microscope when the object being examined is in focus. For most microscopes including the Amscope, this is normally around 4” out of the box. However, we find that this is way too little to be comfortable, so we will attach a barlow lens to the head of the microscope in order to increase the working distance to 6”. Some barlow lenses will even increase the working distance to 8” or more, which can be useful for working with motherboards that have a larger height.
What is a barlow lens? A barlow lens is a lens that goes over the objective lens in of the microscope head. Typically they will screw into the head of the microscope and allow you to change the field of view, working distance, and magnification.
A barlow lens typically screws into the objective lens at the bottom of the microscope head.
Most barlow lenses come in magnifications of 0.3x, 0.5x, 0.75x and 2x. In order to calculate the total magnification power of your microscope with a barlow lens, simply multiply the original magnification power by the factor of the barlow lens (i.e., a microscope that originally had 45x zoom will have 27.5x zoom after adding a 0.5x barlow lens to it):
(Original magnification power) x (Barlow lens magnification) = (New magnification power)
The magnification of the barlow lens will also affect the working distance of the microscope. Lower magnification barlow lenses will increase the working distance, while higher magnification lenses will decrease the working distance. In order to estimate the working distance, multiply your original working distance by the inverse of the magnification, like so:
(Original working distance) x (1 / barlow lens magnification) = (New working distance)
Using this formula, we can see that with a 0.5x barlow lens on our Amscope that has a working distance of 4”, we will get a new working distance of 8”. This is a little excessive for our tastes however, and we like to stick to a 0.75x barlow lens ($49; amazon.com) to get a nice middle ground of around 6”. Keep in mind too that as your working distance increases, the amount of light required in order to see the workpiece also increases, so larger working distances will require a brighter and more powerful light.
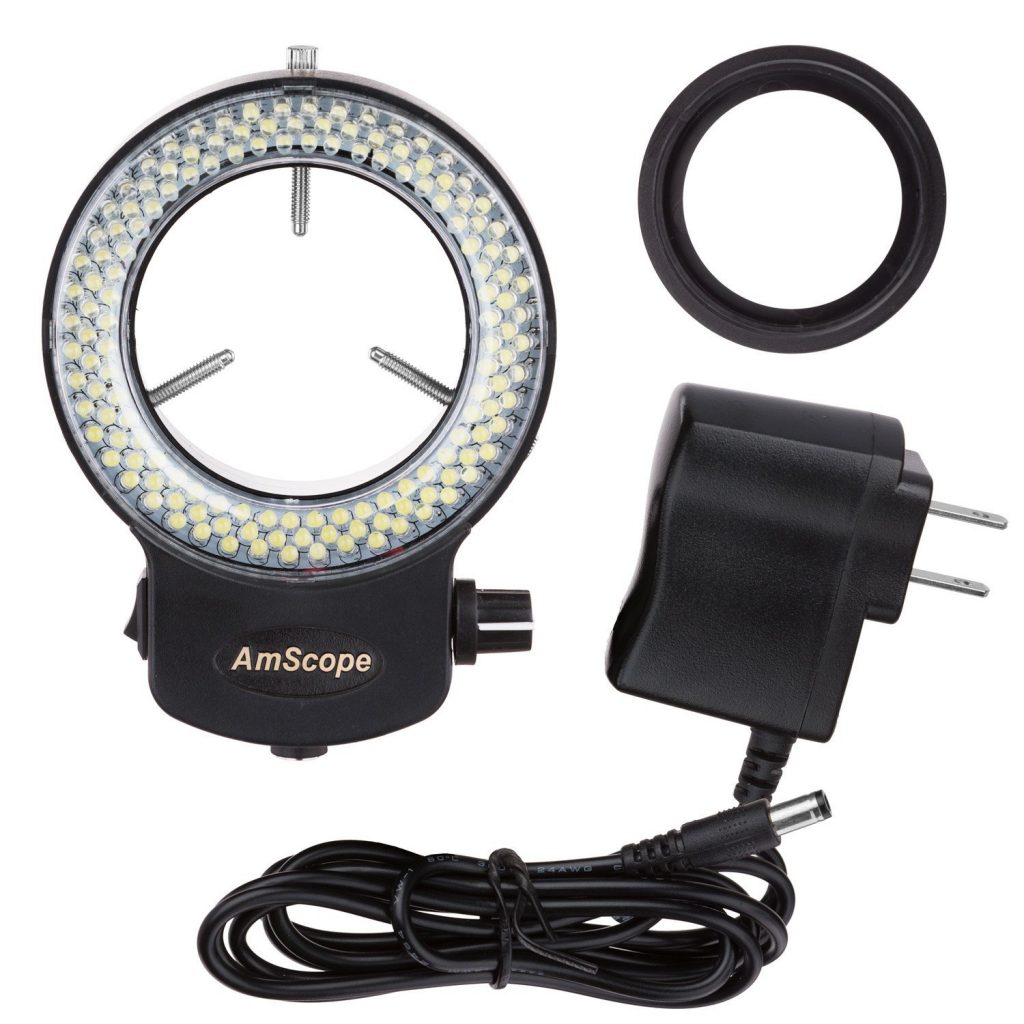
There are many different types of light sources available for your microscope as well. The most popular ones include LED, halogen/fiber optic, and fluorescent. These also come in the form of ring lights and articulating lights. We have found that using ring lights of either the LED or halogen variety work best. Ring lights attach to the bottom of your microscope head and provide ample even lighting around the workpiece. Articulating lights tend to be uneven and require constant adjustment.
Halogen lights are generally brighter and more powerful than commercially available LED lights, although we have seen some DIY LED lights that are equally as bright. The color of the halogen lights also tends to have more of a yellowish tint to it as opposed to the bright blue of LED lights. This yellowish color provides better contrast when working under the microscope and makes it easier to see especially during long periods under the microscope. However, halogen lights use a lot of electricity and therefore generate a lot of heat – think about having to sit next to a 150w space heater all year long. They also require thick fiber optic cables to connect the ring light to the base station that houses the actual light bulb, limiting the microscope’s range of movement.
A halogen fiber optic ring light — note the large base and thick fiber optic cable.
The biggest disadvantage of halogen lights though is that the bulbs do not last nearly as long as LEDs do and also were hard to find. We found that we were blowing a bulb every 3-4 months, and they are not something available at Home Depot. At $30/each and requiring us to keep a few in stock in case one blew, we found that although halogen lights made it easier and clearer when examining motherboards, the reliability, flexibility, and low operating cost of LED lights prevailed in the end.
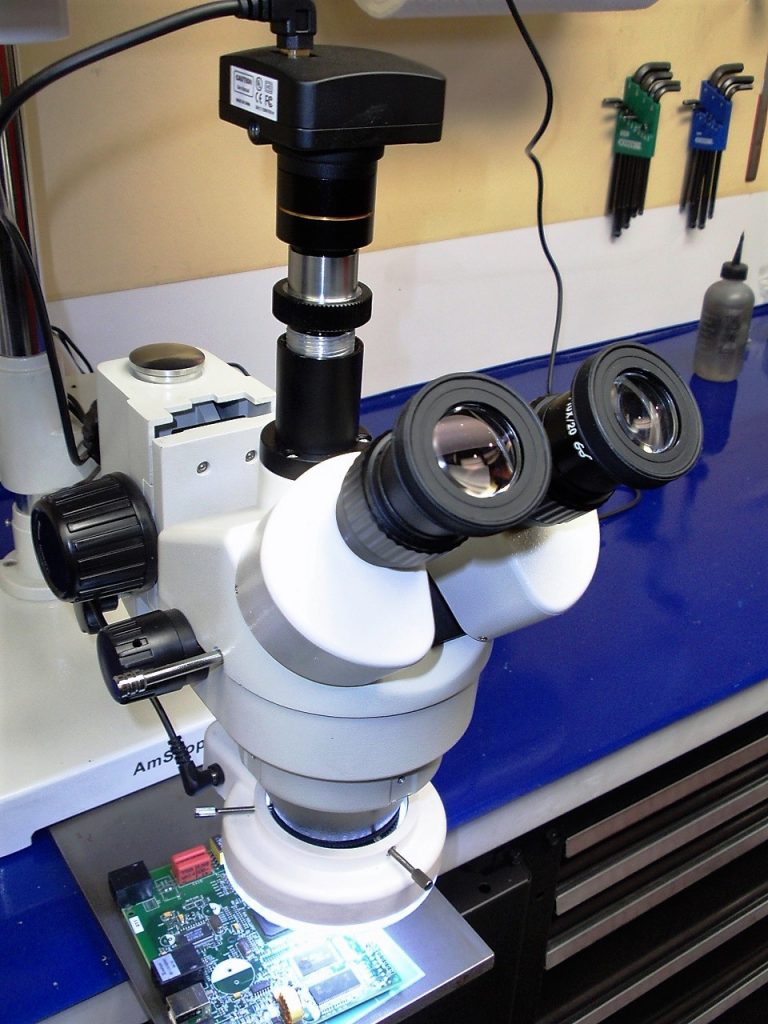
If you would like to add a camera to your microscope, look for a microscope head that is simul-focal such as this Amscope SM-4NTP ($458; amazon.com). A camera is a great way to teach other technicians and assist one another in component level logic board repair, as well as showing customers exactly what sort of repairs need to be made to their device. The trinocular port on the microscope allows the camera to take up its own dedicated spot without losing an eyepiece, while the simul-focal prism allows the user to see through both eyepieces at once while the camera is attached. Be careful of microscopes without simul-focal as it will disable one of the eyepieces when using the trinocular part, completely defeating the purpose of the trinocular port.
Many different cameras are available, however we recommend using ones with HDMI out instead of USB out. USB out tends to be very laggy and requires special drivers and software support, while HDMI is an industry standard and can work with TVs, monitors, capture cards, and lots more.
720p will be adequate, while 1080p will of course be better. There are also lots of options that include either 30 FPS or 60 FPS. We have found that this 720p 30 FPS camera ($139; amazon.com) provides a great picture at a great cost to value ratio. It also allows for direct HDMI output, so you can connect it straight to a TV or monitor. Keep in mind though that most cameras will require a specific c-mount adapter to mount it to the microscope’s trinocular port. This c-mount adapter ($35; amazon.com) is the one we found works with the Amscope SM-4NTP microscope.
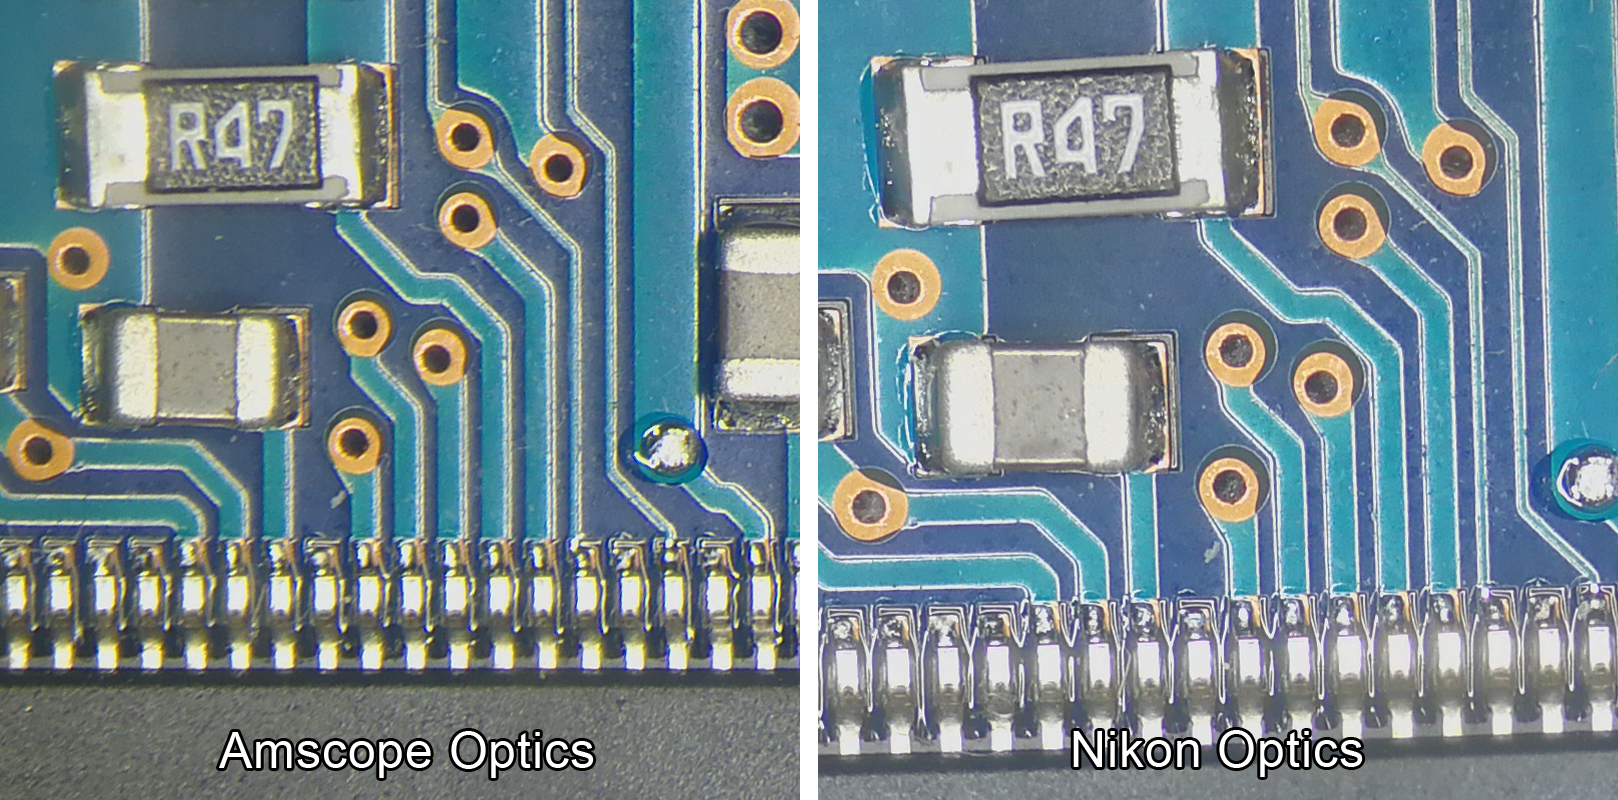
The most important part of the microscope though is the actual glass within the microscope. The quality of the optics varies greatly between each model and brand. For the price, Amscope have got a completely acceptable and functional set of optics, however, for the sharpest and clearest view we have found that Nikon lenses are unbeatable. The clarity and sharpness provide an unrivaled depth of view that is almost 3D, and we found that it allowed for more objects with different heights to appear in focus at once. If you have the time, we recommend scouring eBay and surplus sites for used lab equipment which will usually have significantly better optics.
A 100% crop of the same board shot through an Amscope SM-4NTP (left) and a Nikon SMZ-U (right). Notice how much sharper and clearer the Nikon optics are, especially on the edges of the traces.
Hopefully you now understand everything you will ever need to know about microscopes for micro soldering. If you have any questions or feedback we would leave to hear from you below in the comments!
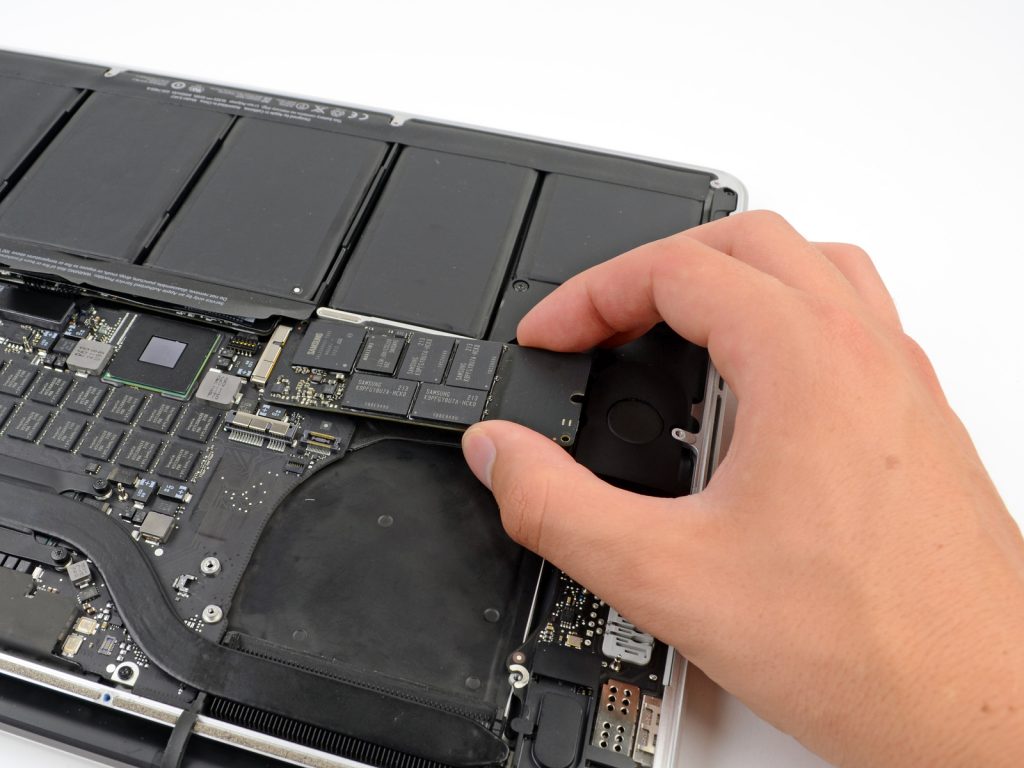
As computers and other electronics become smaller and smaller, the complexity and repairability of device becomes significantly more difficult. Only a couple years ago, charging ports, storage media, GPUs, and CPUs all used to be modular components in most smartphones and laptops, but nowadays they are now all part of the motherboard. For example, all of Apple’s iPads now require soldering to change the charging port (arguably the most frequently used and abused part on a device), their MacBook now comprises of a single PCB inside (and even worse, uses mostly BGA packages), and the latest MacBook Pros have soldered the SSD to the main logic board instead of leaving it as a removable and modular component (no logic board = no data).
Gone are the days of simply removing the SSD from a Macbook to recover data.
Since parts can no longer be swapped in and out just by turning a few screws, it seems that the only option to repair for many repair shops and consumers alike is to replace the entire motherboard at once. However, this is rarely a profitable job for repair shops, nor an affordable one for consumers whose problem frequently is only one small but crucial function like a charging port.
The good news is that with the correct tools and right knowledge, it is possible to repair and refurbish costly motherboards at the component level. This involves the process of “micro soldering,” and more and more repair shops are realizing that by offering in-house micro soldering services to their customers, they can significantly increase profitability, reduce turnaround times, and increase their customer base in ways previously unachievable.
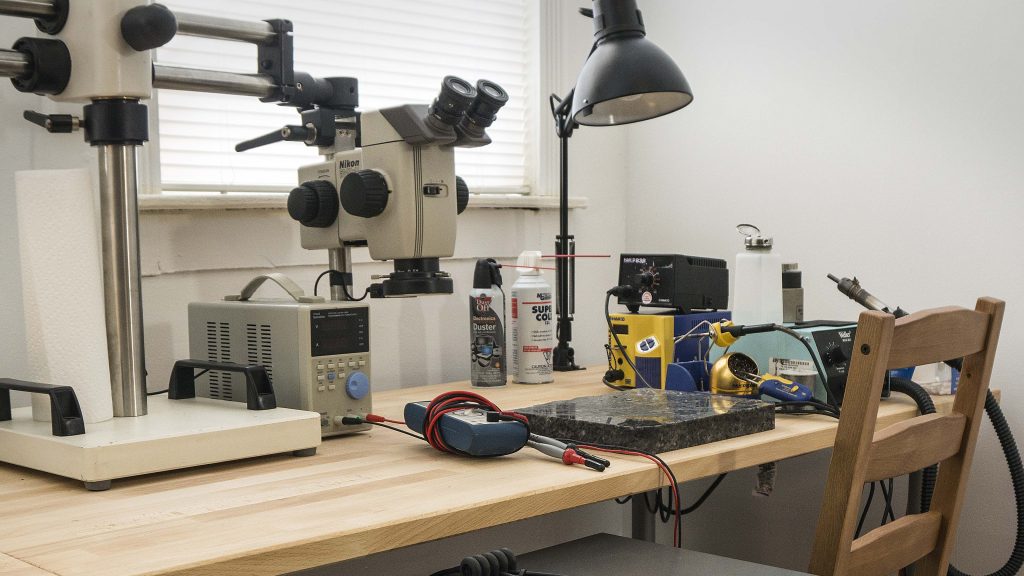
Our main micro soldering workbench.
Component level motherboard repair and micro soldering does require a significant investment of time and effort at the beginning, but the advantages over competitors are tenfold and the applications are infinite. For one, the components involved in motherboard repair are generally extremely cheap, from a few cents to a few dollars. This means that repairs can turn a very high profit margin for the business while still being affordable to the customer.
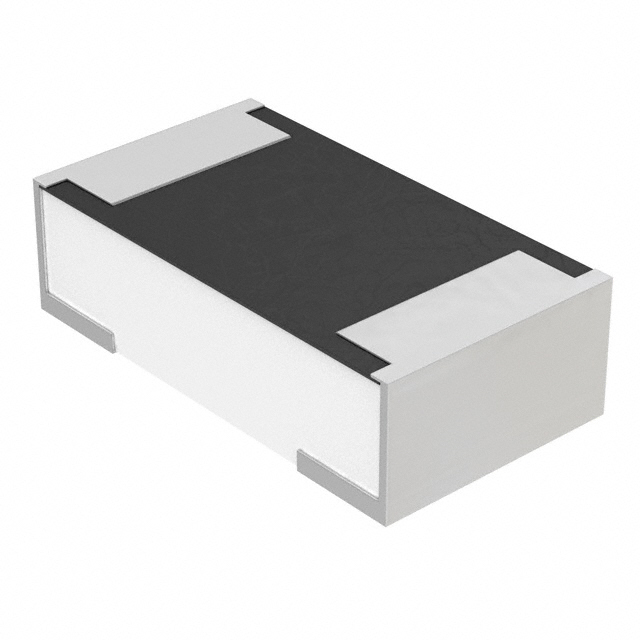
In addition, many of these components such as resistors, capacitors, and connectors are all identical in specification between different makes, models, and even brands. For example, a capacitor on a desktop motherboard may in fact work on a car audio amplifier. This allows for repair shops to stock less parts while servicing many more devices at once, expanding their customer base to all sorts of industries.
This same backlight fuse is a cheap and commonly replaced component that has been in every single Macbook Pro and Air since 2011.
So, what does it take to learn micro soldering and component level motherboard repair? The best place to start is with the correct tools – you can’t change the oil in your car without a wrench, and you can’t learn to solder without a soldering iron. In this series, we will go over choosing a good soldering iron, as well as everything else you will need to learn micro soldering and take your business to the next level.